Friday, March 29, 2019

Paint the Garage

Anxious to make some forward progress, I thought, "What if I painted the garage?"

If I decide to extend the garage, then some of the new paint will be demolished. That's the downside as I see it. Worst case, we'll end up repainting all of it, but the new light paint will act as primer.

The upside is that I get to feel forward movement, something happening. I remove the gutter, scrub the walls, prime the dark fascia and shiplap, then paint. Maybe $150 in materials. Maybe I reinstall the gutter after painting.
The view from the kitchen sink inspired the project.
It's about 45 SF on this side, 40 above the doors. The doors are 112 SF for both. Total 192 SF, or a half gallon. Maybe I hit the garage doors with something slightly darker. 32 SF of primer on the green.

Maybe I keep going on the west side.

The west side would make a great proof-of-concept for a specific color.
Mark, my neighbor on 9th, used Behr "Still Gray" and I like it, but his house gets a lot more sunlight. Still Gray has an LRV of 40. Sherwin Williams Wormwood (HGSW1505) is 38, Magnetic Gray (HGSW1506) is 46, and on the same card, Lapland Ice (HGSW1507), with an LRV of 59, still seems dark to me.

Sherwin-Williams "High Reflective White" (SW 7757) has an LRV of 93.

I would propose High Reflective White in gloss for the soffits (<100 SF, not counting the west wall), and Conservative Gray (SW 6183, LRV 63) for the fascia, gutter, and walls. Perhaps the doors should be Escape Gray (SW 6185).

I'll remove the door handles--the lock doesn't allow you to open it from the outside. I'll see what I can do to repair the bricks--some sort of plaster with touch-up paint.

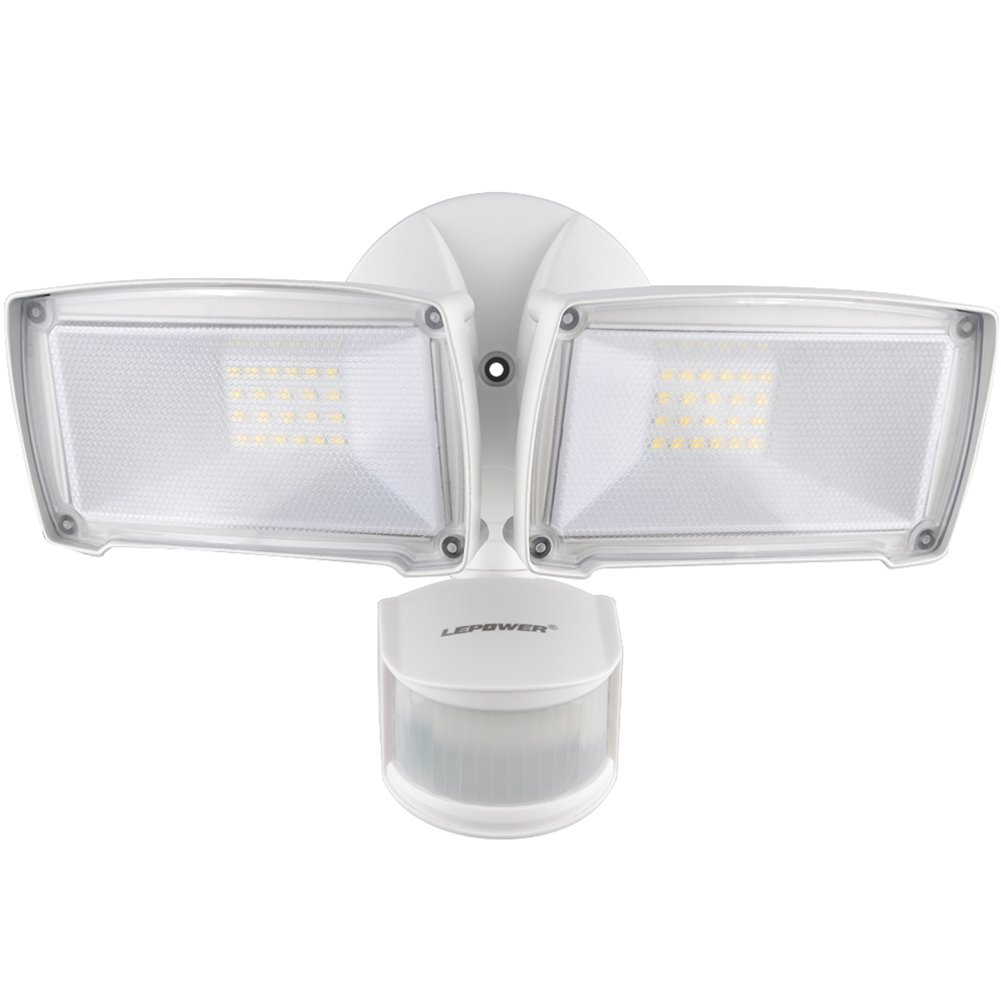
Lastly, the floodlights are stupid--they come on when they see motion even in bright sunlight. Amazon has the fixture on the left for $32.

Maybe I'll continue and paint the breezeway alcove next. That needs more in the repair department, and it is subject to work--new breezeway door, replace frozen windows, the glass blocks and greenhouse window--all are provisional. But, again, hitting the dark blue with primer and Conservative Gray is good prep for a future paint job.

If I decide Conservative Gray is still too dark, I could try Nuance  (SW7049, LRV 74)

Unfortunate that they painted the brick on the left. Not sure what to do with that.

Lots of wires on the soffit to simplify. I think that the two plastic boxes are no longer used (landline phone).
On the front of the house, I need better numbers. Amazon has some nice 6" black metal on standoff numbers for $10 each.
The "front door confusion" in a nutshell. I think, regardless, that centering the number (the 6" numbers) makes more sense.
One more thought: I could paint the brick. I wouldn't want to paint the brick at the living room, but maybe the garage and breezeway could be the same color as the walls. It's a fine line between the elegant monochrome of Coast and a whitewashed shack.

Wednesday, March 27, 2019

Process Going Forward

Confusion and uncertainty, leading to stasis. Not wanting to start a process that will require more money, time, and discomfort than I anticipate to get back to a steady state. Fear of living in a perpetual construction zone because I ran out of money. Fear of spending all my money on gold plate just before the bottom drops out of the real estate market. A nagging worry that either a) I'll make choices for a generic buyer that I won't like, or b) my choices won't be optimal for the market. If I spend too much (pay retail instead of wholesale), I might eliminate any profit margin. But I have to pay retail for most, don't I? Should I be emphasizing aspects where I can do the work myself to save money?

It occurs to me that many homeowners let these fears dictate stasis--doing nothing. If I can resolve my remodeling problem, it might become a marketable process for small architectural practices in the foothills of SoCal.

This is a work in progress; more later.


Home ownership is a continuum. You are constantly maintaining the house and adding improvements as they come on the market and meet with your approval. Some seize on the latest app-controlled light fixtures, and some want little to do with new gadgets.

Goal

For planning purposes, however, we must pin a specific moment in time and describe our house as we want it to be. Many homeowners will say that they are done when they can imagine a realtor and potential buyer being impressed.

Listing-ready. From the curb, at the front door, inside, then through the kitchen, bedrooms, bathrooms, halls and even the garage--the house looks great. There are no problems to disclose; the heating and roof systems work perfectly, everything is clean, good workmanship is obvious. Nothing has to be explained--no "don't flush the toilet while the shower is running"--unless we'd be confident telling a potential buyer that. Some fine homes are a little quirky--Washington slept here, but none of the floors are level.

Listing-ready and Second Unit. My goal is two-fold. I want my house ready to sell, and I want it to either be two units or clearly dividable into two units. The second unit could be for a younger or older generation, it could be an income apartment, or an AirBNB rental. I want the second unit to scream possibilities at a potential buyer.

If the goal is adding a bedroom and bath to an already listing-ready house, things are simpler, but I think that this process is still useful.

In defining the goal, we should be specific and aim for the minimum acceptable goal. Home improvements have a tendency to spiral out of control. Listing-ready is not Architectural Digest-ready.

Issues

Once we have defined a goal, our next task is to identify the gaps between what we have and what we want. The issues (not problems) that must be addressed to achieve the goal. Once we reach the goal, we can enjoy the perfection or sell it and move on. This is preferable to doing the improvements because we must sell--in that case, we have no enjoyment of the finished product. Making improvements with no plan of selling is both unlikely to ever finish and apt to involve quirky choices that will need to be undone later. The house outlives even the most enthusiastic homeowner.

Issue List. We will develop a list of issues, prioritize them, and strike a cutoff line. The finished issue list, above the cutoff line, will be acceptable when clearing the identified issues will make the house meet the stated Goal.

My first thought was that it starts with a master list of what needs to change. Later, this list can be roughly prioritized and cost estimates added to each. The list is then put into phases--at least, a line is drawn between To Do and Put Off. One problem is clear: such a prioritized project list would look like:

REPLACE TOILET - $400
PAINT BATHROOM 3 - $100

But if the list keeps going to

REMODEL BATHROOM 3 - $14,500

you don't want to paint it (or rather, painting is part of the remodel).

Cost estimates go with work items, but the prioritized issue list should be a list of problems, not solutions. It's hard to force yourself to list problems without thinking of solutions.

FRONT YARD LOOKS OLD, TIRED, AND OVERGROWN
FRONT YARD REQUIRES TOO MUCH WATER AND MAINTENANCE
FRONT WALK IS A TRIP HAZARD AND UNINVITING
CEILINGS ARE TOO LOW THROUGHOUT

Taking the front yard down to dirt and xeriscaping it solves the first two problems, but there are less extreme solutions, as well. We can write and edit issues to suit the circumstances. For example, we might say:

FRONT YARD - LESS WATER, CUT WAY BACK, FIX CRUMBLING WALK

We would put it this way if we knew we would address all three if we did one. Keeping them as three issues gives us the flexibility to decide to keep watering at the current rate, for example.

The point of listing and prioritizing problems should be to understand which problems are too big to solve. You can't boil the ocean. For example, the Jones' might list:

NEED BIGGER DOG RUN

Solving that would require buying the house next door or being very creative.

Depending on the current state of the house, we might add a number of items to the Issue List directly from the Home Inspection Report. If the inspector calls for a pressure relief valve on the water heater, that's an item. (Or, as we discussed, we could group all must-do repairs as a single item, with every task enumerated.)

It might be useful to categorize Issue List items. Eventually, we can have a checklist.

Repair - Something installed no longer works as it did and must be repaired. The door bell, for example. Cracked or uneven paving, or roofing is typically "repaired" by replacing it.

Freshen - New paint or wallpaper; trim, prune, clean out existing plants, put in bark. Could be sanding and refinishing wood floors. Swap out a light fixture or an appliance. Replacement windows.

Addition - Add space to the house, build a new deck or patio. Usually involves structure, building permits.

Rearrange - Build a partition, open up a wall. Often involves electrical, plumbing, HVAC changes. Could include cabinetry.

Install - Add something new, like a smoke alarm or an electric car charger. Or a new tree, a fountain, garden lights. Or more insulation or weatherstripping.


Proposals

Once we have a draft Issue List for which solving the issues above the cutoff line would demonstrably meet our Goal, we can develop Proposals.

A Proposal is a design, a list of improvements and repairs, that solves the items on the Issue List without doing too much extraneous work. Proposals must be complete. If the Issue List includes

POST LIGHT DOESN'T WORK

each Proposal must address it. One might include "Fix Post Light," while another Proposal might say "Remove Post Light." A Proposal is not done until we can check off each item on the Issue List.

Ideally, we will create multiple proposals for consideration, because choosing from several alternatives yields a better solution.

Sub-Proposals. We can develop a sub-proposal for a kitchen remodel, for example, and reference it from other proposals. We can develop multiple kitchen remodel Sub-Proposals and mix and match them in comprehensive Proposals. A particular Proposal, however, may not accommodate every kitchen Sub-Proposal.

Likewise, things we're going to address routinely, such as a list of repairs to make, can be assumed by each Proposal.

The Issue List isn't set in stone as the Proposals are developed, but any changes should be carefully considered. There is a tendency to fall in love with a particular solution and want to adapt the problem definition to fit the solution. Resist that tendency, but don't rule it out.

Without identifying the Goal and Issue List, developing or requesting Proposals has a shaky foundation. Rejecting a Proposal feeds into a sense that there's no solution, that the house is a rat's nest of problems, each of which needs to be tackled before considering something else. Without a comprehensive plan, you might ask a contractor for a kitchen remodel Proposal, sign a contract, and spend a lot of money. It might work, but you won't know if you've achieved your broader goal, or whether the new kitchen is now an impediment to doing other things.

Cost/Work Estimates

As the top Proposals emerge from the process, we should be able to imagine them meeting the items on the Issue List and achieving our Goal. If our Goal is to be "Listing-ready," visualize the house from the curb, at the front door, and so on. If the Proposal leaves you disappointed, it needs to be improved.

It is important to take the definition of the Goal, the itemized Issue List, and the responding Proposal(s) seriously, because the next step, Estimation, is time- and labor-intensive. We don't want to create a detailed Estimate lightly, and we don't want to guess.

The Estimate is not a specific price, but neither is it a finger in the wind. A thorough estimate can help choose between alternative Proposals. If you can select the final Proposal before the Estimation step, that minimizes the estimation work.

Each item of work has a cost associated--often labor and materials--and we use the labor hours to estimate the item cost, but in addition we want to develop an estimate for the time our project will take. Will the bathroom be out of commission for 8 weeks or 16? How long will the roof be exposed to the rain?

Go/No-Go

Armed with a detailed Estimate for a specific Proposal, we get to decide whether $X is a reasonable price for the Goal that we laid out. That may involve our best estimate of how much we could sell our "listing-ready" house for at the end of the process. Perhaps we have other places to invest our money besides our house.

Ideally, we developed our Goal, Issue List, and Proposals to be as minimal as possible. If we decide No-Go, perhaps we need to go to back to the first step and imagine something less ambitious.

Work List

If the project is a Go, the first step is to develop the Work List. It is usually most cost-effective to do all demolition, rough utilities, framing, doors/windows, and HVAC at once, rather than call these trades out separately for each room. But you might want to finish one room at a time, painting and decorating the guest bedroom last, for example.


Sunday, March 24, 2019

Beach House Designs

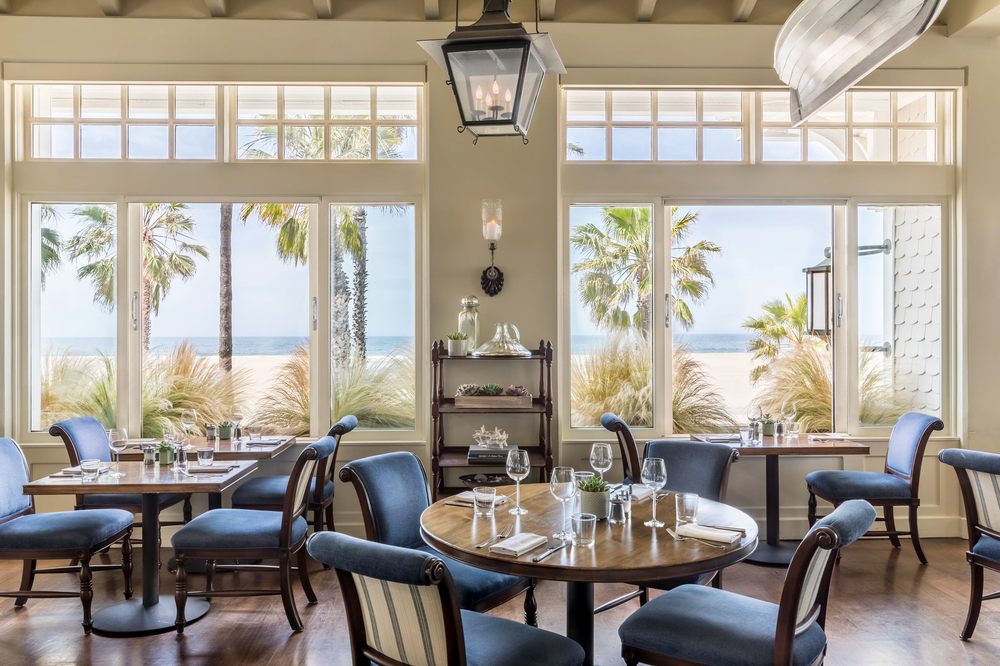
Peggy sent a Houzz article on this subject, and I really like this room:


The muted blue-gray, the potted plants, and the relentless white is what my house needs. Designer Gabriela Gargano; Jute rug, bleached whitewashed floors. "We stuck to white, taupe, black and oak...and layered in some cool blues and natural tones for warmth and contrast." Her tip: "Paint the ceiling, walls and trim one color to disguise lower ceilings."

Another project, which comes off as white, is actually "Agreeable Gray" by Sherwin-Williams.

Friday, March 22, 2019

Beach House Furnishings

I'm looking forward to a bed like this:
I have a Malm nightstand that I like. I think maybe I could paint it white, maybe with an antique finish that lets the brown show through. I could get a piece of glass for the top.

Just the way Jim Poole painted everything black, I could paint things beachcomber white.

Exterior Colors - Examples

Update 3/24: Light green is emerging as the direction. This house (12036 9th Ave.)  illustrates the vertical siding over horizontal shiplap, in green, with brick:


Example M
It also shows what white eaves, fascia and gutter looks like on a black composition shingle roof.

Is that a two-tone? Or does the shiplap reflect more of the sky? SW 6435 Gratifying Green is lighter than Example M. Maybe SW 6436 Bonsai Tint? Maybe I ask my neighbors (we met at a block party last year, but they're not on Nextdoor).

Update 3/24/19: I asked my neighbor, Mark, and he told me. He used Sherwin-Williams Duration paint. SW matched a Behr color called Still Grey. The eaves and fascia are a Behr color called Tinsmith. His house was built, along with its neighbor to the south, in 1955, but it's the same mid-band molding as mine. While the neighbor is vertical T&G like mine, Mark's is actually a striated board without v-grooves. Mark did 10 different color samples and took several days to decide on Still Grey, by the way. His flush front door color is from the same card as Still Grey, two shades darker. Mark's eaves, by the way, are exactly like mine.

Peggy had a couple of houses with something like Gratifying Green:

Example E

Example I

Peggy's examples from Sierra Madre:
Example A

Example B

Example C

Example D


Example F

Example G

Example H
Alastair's examples from Broadview:
Example J

Example K

Example L


Beach Colors

Enjoying the decor of Coast restaurant at Shutters on the Beach, 1 Pico Blvd., Santa Monica, CA, I'd like to recreate the feeling here. (Coast and Shutters on the Beach are the work of Michael S. Smith.)


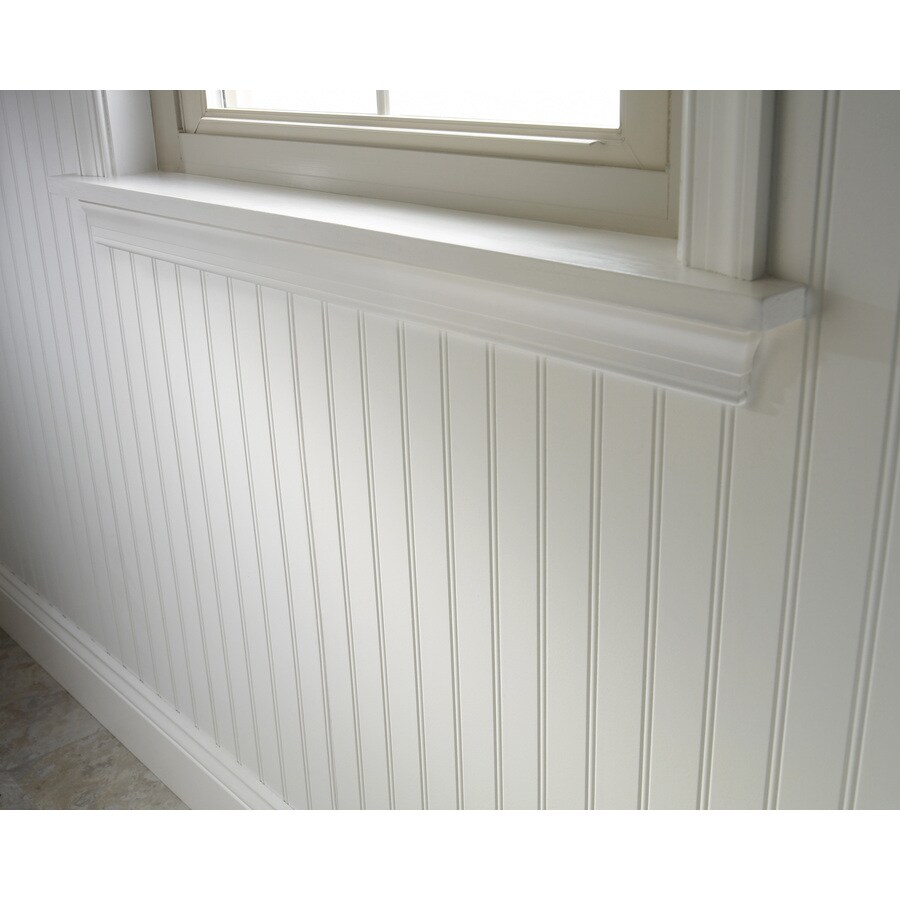
It seems to be a gloss, bright white (SW 7757 High-Reflective White) trim, with a satin near-white (SW 7005 Pure White) on larger surfaces. Woodwork and beadboard. Light and airy, which my house needs because most of the windows face away from the sun in the shade of tall trees.

I particularly like the simple wood framing on the ceiling--perhaps that would be all painted satin "near white," rather than treating the wood separately from the ceiling itself. There was a low ceiling at the restrooms at Coast "coffered" 3/4" like this, and it worked well.

Update 3/23/19: I drew up a "coffered" ceiling plan (all but the kitchen and BA1) and found that it represented 778 LF of 1x4 (8 sheets of 4x8 MDF--see below). $300 worth of materials for the ceiling.

The color experiment I tried in 2015 used Glidden Ultra-Hide 220 (~$22/gal, apparently no longer sold by Home Depot). I used three colors in that: light (Distant Ocean Grey), medium (Blue Grey Sky), and a dark blue (Approaching Storm). I think the Distant Ocean Grey still goes well with the white enamel window on the Living Room east wall. The other two have too low a LRV (light reflectance value). High-Reflective White is 256, Pure White is 255. An accent, like light blue "French Moire" is 173 or a light green "Oh Pistachio" is 150.

To avoid requiring top quality boards, a carpenter on YouTube suggests ripping a 48" x 96" sheet of 3/4" MDF into 3 1/2" strips (and taller baseboards, etc.). You could get 13 strips, or 104 LF of 1x4 that way. The sheet is $30.63 at Lowe's, so (not counting cutting costs) it's .30/LF. 1x4 Poplar is $1.92/LF.

While we're looking up prices, 4'x8' of hardboard beadboard is $20 ($.625/SF). "HGTV Home by Sherwin-Williams" high-gloss trim paint is $33/gal. Infinity satin latex is $45/gal.

I considered the exterior a bit, but it needs more study--looking around the neighborhood and thinking about style trends. Painting the house's exterior will be a much bigger project. For one thing, the fascia under the gutters all around is the dark blue used at the mid-band.

The exterior is currently three sections: Lower, horizontal clapboard; upper, vertical T&G (and the same on the wide eaves), and a horizontal band between them. The current colors are:

  • Upper and Eaves: Bright white (like SW 7757 High-Reflective White)
  • Mid-band and fascia: Dark blue (like SW 9179 Anchors Aweigh)
  • Lower: Gray blue (like SW 9161 Dustblu)
This sets up a high contrast between upper and lower and tends to make the house seem squashed and even more horizontal, to me. Maybe I'm wrong.

I'd like to tone down the white a little, but use it for eaves, uppers, and lowers. Actually, I wonder if the bright white/near white approach discussed for the interior might make a nice distinction between walls and eaves. Sherwin-Williams exterior whites include a slightly creamy Iconic White (SW 4004) and a slightly grey Belgian White (SW 4025).

The mid-band molding could be similarly painted out, but I wonder if a pop of color, like a Seahawks green, might make an unusual ribbon around the house. It's only about an inch tall; it might not even show from the street. We could pick up that color for the front door and garage doors--you'd see them from the street certainly. Sherwin-Williams has a pretty intense avocado that they call Venomous (SW 1232).

Monday, November 19, 2018

Revealing the Roof

There's a roof under all that tree litter. It was clean a year ago, September 27, 2017.

The garage roof and half the breezeway is now clean. It took about 90 minutes on the roof. My arm is still tingling from the leaf blower.


The mess looks so dry and lightweight that all you'd have to do is run the blower over it. Not true. There is moist soil in there, gripping the shingles. When it finally peels off, it looks like roll out grass sod.


There is still some stuck to the edges--I didn't want to get that close to the edge. The detritus is covering the driveway, the deck, and--predictably--filling the gutters. I'm thinking the process is:
  1. Blow off the garage roof (the worst mess)
  2. Blow off the main roof (larger, but less messy)
  3. Go around, methodically, and empty the gutters
  4. Rake and bag the driveway
  5. Rake and bag the deck
With Thanksgiving coming up, I'm thinking I may revise the first two as:
  1. Do what I've already done--blow off the worst
  2. Blow off the entire roof when I get home from Thanksgiving
Bottom line: 90 minutes of physical labor combined with a risk of falling does me in! I might be able to do 3 or 4 hours with the gutters, where I'm a lot less likely to hurt myself.

Some folks on YouTube demonstrate building a U-pipe for your leaf blower so that you can blow out your gutters while standing on the ground. Might be worth a try.

Steps Project

I want to remodel the whole front yard. New hardscape, and so on. But at the moment, my path from the driveway to the house is only barely w...