Thursday, April 30, 2020

Miter Saw

I went to Lowe's expecting to buy a Kobalt or Hitachi 10" sliding dual bevel miter saw for $249.

Instead, I found that these things are bulky and heavy, so I started wondering what I really need. I see myself cutting a lot of 1x6 Trex, 1x4 ceiling plant-ons, and 2x8 framing for the deck. I confirmed that 12" blades are more than 1/5 as expensive as 10" blades (as if they charge by the inch in diameter)--same blade $27 for 10", $35 for 12"; $45 for 10", $55 for 12".

So, I bought a Kobalt SM1816LW 7/14" sliding single bevel saw for $159. It's only 10-amp (less likely to trip a breaker) and it weighs 22.5 pounds.

It can cut 8" wide (so, 2x8s) and it's at least 15 pounds lighter than the bigger saws. I think the marketing is pretty blatant--guys, you want a 7/14", a 10", or a 12"? The guys choose 12" every time. It's how they're wired. Luckily, I transcend all that.

I'm keeping a list of what I don't like, but how it attaches to the stand is not on the list--that was very smooth. I made a few cuts, and virtually all the saw dust went in the bag--that's good. I checked the alignment--looks good.

  • The demo model at Lowes had the old-style handle-switch. Mine has the new style, a two-part switch that seems like an annoyance and that it might be the first thing to break.
  • The sliding track forward and back doesn't seem smooth and precise--it feels a little rough and imprecise, but that's ignorable if the cuts are good.
  • The laser guide has to be manually turned on and off. My phone knows when I lift it, but the laser can't figure out I'm using the saw. As a practical matter, this means the laser will be left on because I forgot to turn it off.
  • The depth feature, useful for making dados, stops the blade from sliding all the way to the fence. You have to build out the fence with scrap lumber to make it work. (But it does work.)
So, I'll give the thing a try. First up--saw horses to hold the salvaged deck lumber off the ground. Lowes has a 90-day return policy. I think I'll see if I've made a mistake a lot sooner than that.

Wednesday, April 29, 2020

Rendering

Real scan to follow, but a quick snapshot for now:

Brick in the Master Bedroom

The drawings said that there would be brick behind the wall, and said wall had a visible drywall seam that will need attention, so...
The closet is awkward, and the drywall seam is visible
So, the wrecker (me) investigates. Sure enough, brick. Not pretty brick--they didn't worry about keeping their courses perfectly level, for example, because they knew it would be hidden.
It looks like art
The right side is 1x boards, of the kind used for the house's sheathing, lining the closet. The brick steps wider below the opening, to accommodate the firebox on the other side. The as-built drawing illustrates.
The circle on the right is an abandoned furnace vent
So, what have we learned? Not much. The yellow walls are so boring, a flash of brick and old wood is delightful. Because the studs are 1/2" from the brick (I remember that note from the standard fireplace detail), we now have 1/2" wide gap delivering basement air into the bedroom.

Ikea Pax $290 as shown
I'd like to reconfigure the closet to be more useful. It will always be secondary to the main closet, which is more accessible. The wall I cut into should be the head of the bed, lining up on the morning view, which means the closet is even more remote. I don't like the bed that way for, among other reasons, a lack of night stand space. Maybe I can come up with some sort of wall-mounted, swing-out shelf?

The closet door is 41" and the bed wall is 73". The queen headboard is 66", so we have 48" to play with. Allow an 8" nightstand shelf on the door/bathroom side, and a 40" cabinet would fit where the closet is now. Something like this Ikea Pax, which is only 15" deep.

Between the fireplace and the wardrobe, custom shelves open to the room above the headboard.

Pax is 39 3/8" x 15" x 79 1/4" (my ceiling height is 93", btw).


Monday, April 27, 2020

I Think I Need a Miter Saw

You may recall that I bought a stand for my Makita chop saw last May, only to discover that the Makita was so old, it couldn't be bolted to a modern stand. Also, the power cord is crumbling. Other than that, it's working fine, except that it doesn't have a laser. A laser would be so cool.

I'm starting to think I can make do without a table saw. Table saws do crosscuts poorly compared to a miter saw, but they are great for ripping. If you want to make a 1x4 3" wide instead of 3 1/2" you want a table saw. And while that might come up with the woodworking I anticipate for the living/dining room, it is less likely for the other projects. If a miter saw can cut 2x8s, we can build the deck and the ceiling 1x4 "beams."

Miter saws come in 7-1/4", 10" and 12" blade sizes. DeWalt is fairly expensive, and they cut back on the bells and whistles to make you buy even fancier models. Festool is 3x DeWalt, and brands like Bosch, Milwaukee and Makita fall between DeWalt and Festool, it seems. Ryobi and Kobalt are sold by Home Depot and Lowes, respectively, and they are cheaper and aimed at the home market. Oh, and Metabo HPT (formerly Hitachi) is in there somewhere, too.

DeWalt DWS715
Peggy has a DeWalt DW715 12" Single-Bevel Compound Miter Saw. It has been replaced by the DWS715 @$200 (Amazon). It doesn't slide, but they claim it can crosscut a 2x8 at 90-degrees. No laser.

The 7-1/4" models are generally lighter and therefore more portable, but they tend to be cordless, and I need more power. The Evolution R185SMS is $173 (Amazon) is a small saw that might work. The Kobalt SM1816LW  7-1/4", 10A, model is $159 (Lowes) and can do 2x8 at 90-degrees because it slides.

I'm leaning toward a 10" or 12" blade, sliding compound saw. I don't think I need (or know how to use) the compound part, but sliding miter saws that are not also compound (like the Evolution, above) are odd ducks.
Kobalt SM1816LW. It looks like a chicken.
I like this guy. He suggests 10" since 7" is too small, and 12" blades are more expensive. He doesn't think DIYers need sliding.

ModelPriceNotes
Metabo C10FSHCTM$249 Lowes
Metabo C10FSHCT$249 AmazonDual bevel, sliding, laser
Metabo C10FSHCM$249 LowesDual bevel, sliding
Metabo C10FCGM$149 LowesSingle bevel
Kobalt SM2517LW$249 LowesDual bevel, sliding
Craftsman CMXEMAX69434501$219 LowesSingle bevel, sliding
Evolution R255SMSDB+$349 HD
Evolution R255SMSL$189 Lowes, $194 HD
Evolution R255SMS+$230 Lowes, HDSliding, laser
DeWalt DW713$219 Lowes, HDSingle bevel
DeWalt DWS713$219 Lowes, HD, AmazonSingle bevel
DeWalt DW717$499 HDDouble bevel, sliding
Bosch CM10GD$480 Lowes, HDDual bevel, sliding
Delta S26-260L$122 LowesSingle bevel
Delta S26-261L$179 LowesSingle bevel, sliding
Delta S26-262L$137 Lowes, $120 HD, $122 AmazonCompound
Delta S26-263L$199 Lowes, Amazon, $150 HDCompound, sliding
Delta 26-2241$400 HDDual bevel, sliding
Ryobi TSS103$219 HDCompound, sliding
Ryobi TS1346$134 HD
Ridgid R4113$219 HDDual bevel. LED cut line indicator
Ridgid R4210$384 HDDual bevel, sliding
Makita LS1019L$599 HD, AmazonDual bevel, sliding, laser
Makita LS1018$433 HDSliding
Makita LS1040$219 HD, $225 AmazonSingle bevel. Looks like mine.
WEN MM1011$197 HD, $194 AmazonSingle bevel, sliding
WEN 70730$213 HDSingle bevel, sliding
Professional Woodworker 8633$137 HDCompound, laser
General Intl MS3005$128 HDSliding, laser
Genesis GMSDR1015LC$160 HDSliding

The Hitachi or Kobalt $249 models (dual bevel, sliding, laser) would be okay. The Bosch is attractive for its low-clearance design, not its $480 price. I like Makita as an upscale brand, but I don't like their old-fashioned handle. The leaves DeWalt, like the DWS713 for $219. If a DIYer doesn't need sliding, and DeWalt is the quality benchmark, maybe that's the model for me.

DeWalt DWS713, $219 everywhere. No laser.
The other possibility is the Kobalt SM2517LW. For $30 more, you get dual bevel, sliding, and a laser. I'll also compare the Hitachi (Metabo C10FSHCTM). The Hitachi has a unique rail design that requires less space for rails in the back.

Hitachi C10FSHCTM
Specifications:

Maximum crosscut: 2x12 (Kobalt), 2x6 (DeWalt), 12.5" (Hitachi)
Max 45-degree crosscut: 2x8 (Kobalt), 2x4 (DeWalt), 8.75" (Hitachi)
Max vertical (baseboard): 4-1/2" (Kobalt), 3-1/2" (DeWalt) [Amazon says 4-1/4"]
Miter left: 55 degrees (Kobalt, Hitachi)
Miter right: 60 degrees (Kobalt, Hitachi)
Bevel left: 48 degrees (both)
Bevel right: 48 degrees (Kobalt), 3 degrees (DeWalt)
Bevel lock: front (Kobalt, Hitachi)
Laser: red, tool-free adjustable (Kobalt, Hitachi), No (DeWalt)
Amps: 15 (all)
RPM: 4450 (Kobalt), 5000 (DeWalt), 3200 (Hitachi)
Electric brake: Yes (Kobalt, Hitachi), No (DeWalt)
Weight: 43.2# (Kobalt), 31.4# (DeWalt) [Amazon says 38.1#], 40.7# (Hitachi) [Lowes says 45.6#]
Cord: 6'
Warranty: 3-year (DeWalt)
Kobalt SM2517LW

Tuesday, April 21, 2020

Revit ToDo

Finish Revit as-built model.

-Delete topo and start again.
+Walls at MBr vestibule, linen closet
+Opening Liv Rm to Dining Rm, Liv Rm to Hall
+Cased openings at Kitchen (S, E), Kitchen to Breezeway
+Door to MBr closets (sliding), BA2, Linen
+Chimney, hearth
+Slab floor at former Garage, with curb and footings
+Vault, with concrete walls and Breezeway floor
+Breezeway ceiling
+Basement steps
+BR3, BA3, Hall3, Closet ceiling
+Workshop loft, support post
+Stairs breezeway to Hall3
+Roof: Garage, Main, Breezeway
+Corner Kitchen window
+Glass Blocks x2 at Kitchen
+Greenhouse Window
+E Liv Rm window
+E MBr window, W BR2 window (similar if not identical)
+S MBa "door"
+S BR2 window
+N Breezeway windows x2
+Door Breezeway to Hall3
+S BR3 Dutch door
+S BR3 window
+E BA3 window
+W BR3 window
Garage doors x2: add vertical siding
Add brick veneer, "chair rail" with vertical and horizontal siding
+Front path
+Front light post
+Locate trees around property

Monday, April 20, 2020

Investigating the breezeway wall

The latest plan calls for deleting the west wall of the breezeway (behind the Kallax bookcase). So, I went investigating.
Opened up the wall at what will be the top of the steps
All wires, including the one that ends in wire nuts, are live
So, we learn that there is no curb on the vault roof/breezeway floor (that's good), and we have what looks like 1x6 sheathing (likely foundation form boards) behind the T&G vertical wood on the other side. The fact that it is an ordinary stud wall is also helpful.

The wires are not unexpected--there is a 5-gang switch plate on this wall. But it's still sad to see fire hazards like the wire terminated in the wall, surrounded by insulation, with the wire still hot.
The wires are slop-over from the old panel, now a huge junction box.
The top of the huge junction box is a mess, but the ceiling break will help.
The breezeway tile is +262' 11" (1" down from the main house finished floor). The wood ceiling in the breezeway is +270' 6" (7' 7" high). The gyp bd in the BR3 vestibule is +269' 11-3/4". We'll probably fashion a box beam for the wires. (The wiremold supplying the workshop runs along the wall/ceiling at that point, as well.)
Wiremold needs to be worked into the design. The breezeway ceiling on the other side of the wall is 6" higher.

2' x 3' investigation
The 5-gang switch panel is:

  • 3-way switch for breezeway light
  • BR3 Vestibule ceiling light
  • Found a loose landscape light over by the west property line in the backyard that this controls
  • Unknown
  • Separate switch with indicator light for BR3 heater
Basically, the original house was wired to the panel on the south side and every wire was extended to run over the vestibule roof to the new panel.

Another thing that is interesting is that the siding bumps out 2" or so to the west of the sliding glass door in the breezeway.


This is how the house looked in 1947, as far as I can figure

Correction: On the 1947 drawing, "Elec. Meter" should be "Elec. Panel." The meter was likely out in front, where the reader could see it, and the mains from the meter to the panel ran in the unfinished garage, which was likely illegal when they converted it to habitable space, or when they enclosed the walls, or something.


Friday, April 17, 2020

New BA3 Water Heater

The current water heater is 12 gallons, 120V, 1500W element. The space is narrow: 20" with a 15" opening. The closet is about 35" deep and we could go 8' tall if we reconfigure the shelf. There is 240V power on the exterior wall, so it shouldn't be too hard to bring it inside. The current Whirlpool water heater has no TPM--we probably want to route a PVC pipe outside.

Conventional

Casey found AO Smith ENT-40 40-gal 4500W. It is ~$360, 18" diameter and 60.25" high (Tall).

Tankless

If we have 240V, we can consider tankless. We have a 50A circuit breaker, so we're limited to 12kW. The First Hour rating of the conventional 40-gal unit is 53 gallons.

The EEMax HomeAdvantage II might serve our needs. It only draws 33A, meaning 8kW. EEMax has models that require multiple circuits, up to 36kW. It seems more like a point-of-use heater, though, so that you get instant hot water at a sink.

I don't think we can combine a conventional and a point-of-use tankless on the same circuit.

I think we gave up tankless because it needs major amounts of electricity.

On average, an 8.2-minute shower uses 2.1 gallons per minute. (Source: https://www.home-water-works.org/indoor-use/showers).

Gas

Another option to consider is that we can run natural gas from the basement over to the bathroom. We certainly have the gas capacity. That definitely requires a licensed plumber and a building permit, but then we would have more options, such as this Rinnai Gas Tankless Water Heater. We could install it outside, so the gas line wouldn't have to enter the house, and we would have only plumbing inside the closet. We might want to replace the shower stall with a larger one (although drain position would have to stay the same).

Wednesday, April 15, 2020

New gutters

The fascia board is rotten in some places (north breezeway, east side, for example), meaning that I have to remove and perhaps replace the gutter to access the fascia. In theory, painting the blue fascia will should involve removing the gutter, but a) the primer experiment suggest that the gutter hides the unpainted wood, and b) the gutter is fine in most places.

The current gutter is seamless--there are no seams across the front of the main house, or the garage. Replacement, DIY, gutter has seams every 10'. Here's the cost breakdown:

(26) 10' lengths @$7.33 = $190.58
(25) Slip joints @3.26 = $81.50
(8) Outside corners @$8.98 = $71.84
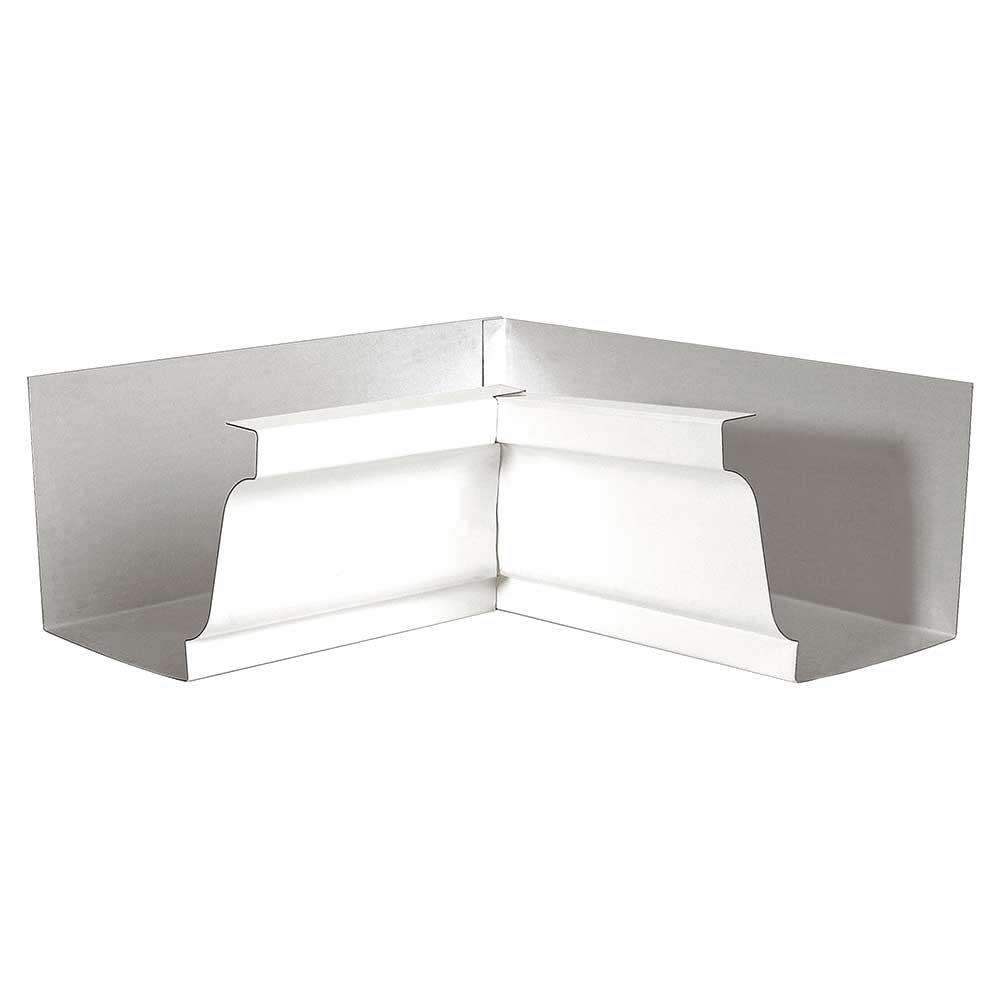
(2) Inside corners @$8.98 = $17.96
(8) Downspout assemblies @30.83 = $246.64

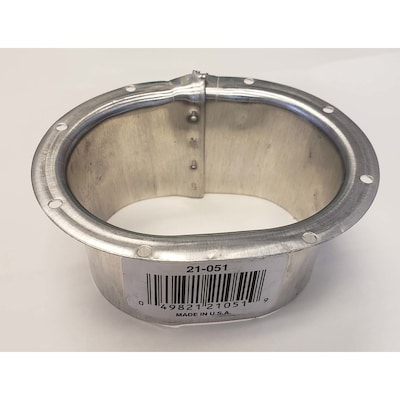
Downspout assemblies are: Gutter drop, (2) 45-degree angles, 10' of 2x3 downspout.

The whole house is $608.52 ($675.46 with tax) for materials. Another $75 for tools and fasteners.

Update: Turns out ordering seamless gutters to a specific length (like 40' across the front of the main house) is simple. They come out with a truck and hand you a one-piece gutter (or something). Seattle Seamless Gutter.com.

Also, you don't need a gutter drop and slip joints. You can just cut a hole in the bottom of the gutter and insert a grommet. That cuts $44.40 off the downspouts.

Monday, April 13, 2020

Breezeway in Gray Screen

This weekend's experiment involved buying a quart of Sherwin-Williams Gray Screen and applying it to the north breezeway wall. I used basic white primer to hide the dark blue trim, fascia, and gutters, and painted the wall Gray Screen.
The dark blue was hard to cover with primer. The light fixture was home to many, many spiders.
I took down the porch light--I imagine the community of spiders here referred to it as the Light House. When they painted the white over the previous cream, they didn't bother to remove the light fixture, so there was bare wood under it and white slopped over on it. I cleaned it and used my go to can of black spray paint on it.

But I digress. The main thing was to paint the incredibly light gray on the white walls. I also painted the section around the electric meter that had been painted with Acier. Just what you don't want in a paint--it's impossible to see where you have and haven't painted when it's wet, and when it dries, it's obvious.
Maybe two shades darker on the Gray Screen (Network Gray 7073, LRV 37, not 59).


Friday, April 10, 2020

North Elevation

Here's a full size north elevation of the house for paint and other purposes. The centerpoint is the walkway, just past the post light.
Panorama, 4/10/2020 15:37


Grays

Peggy suggests the quiet sophistication of grays for the exterior color scheme. Because white fascia seems to work, and Acier doesn't seem neutral enough (too warm?), we need a coordinating set of grays.

Here's the set from the most recent discussion of exterior colors with some basic choices:
  • Vertical siding (Gray)
  • Horizontal siding (Gray)
  • Chair rail (Gray)
  • Door/Window trim (White)
  • Garage doors (Darker Gray)
  • Garage door trim (White)
  • Downspouts (Gray)
  • Gutters (White)
  • Fascia board (White)
  • Eaves (White)

This boils down to:
  • White: Trim, Fascia, Eaves, Gutters
  • Gray: Vertical and Horizontal Siding, Downspouts
  • Darker Gray: Garage Doors
Alternates: 1) Make the garage doors a Lighter Gray; 2) Use two grays for vertical and horizontal.

Gray Screen (7071) seems like a solid medium cool gray, LRV 59. A darker gray from the same card (235) is Software (7074). Software is LRV 23--that's very dark. S-W seems to suggest Site White (7070) to coordinate with Gray Screen. At LRV 73. it is lighter than Gray Screen, but not really a bright white. If we wanted Alternate 1 (lighter garage doors), maybe we go with Site White for that.


Thursday, April 9, 2020

White roof trim?

A lot of homes in the area have white trim/gutters at the roof. I wonder what it would look like on this house? We could use the lightening effect, but would it accentuate the old, battered gutter and would it look okay with the dark gray shingles?
Test (right) of white trim on Acier wall
To better visualize, I painted a test section with white primer. I think I like it. I also don't think the dents in the gutters are any more or less noticeable.
The gutters and fascia are not in great shape.

Here's an example from 12233 9th Ave NW. I plan to paint the downspouts to match the wall, however.

Wednesday, April 8, 2020

Front Door

Clever Peggy points out that knowing the style of the front door will help choose exterior colors. I don't like the oval-ness, light stained wood, or overwrought moldings of the existing door, so I plan to change it.

I like something simpler, more Shaker, which will go with the simple painted woodwork I'm planning for the living room. I'm still inspired by the easy, casual look of Shutters at the Beach.

I'm not planning to add side lights (there's no room, anyway), nor do I want to try to reshape the house as Mission or Craftsman, but some of those details wouldn't bother me.
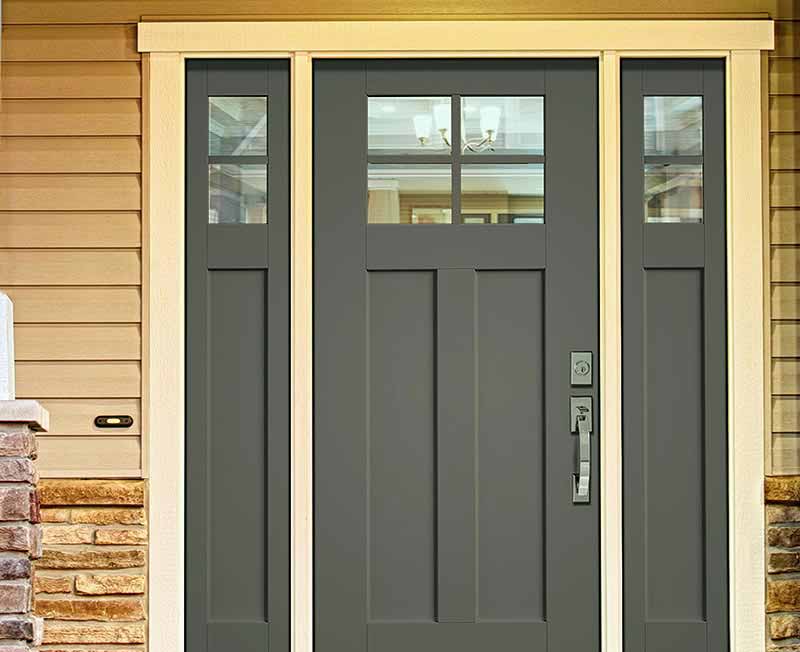
Just the door, not the side lights. I like the hardware and the color, too.
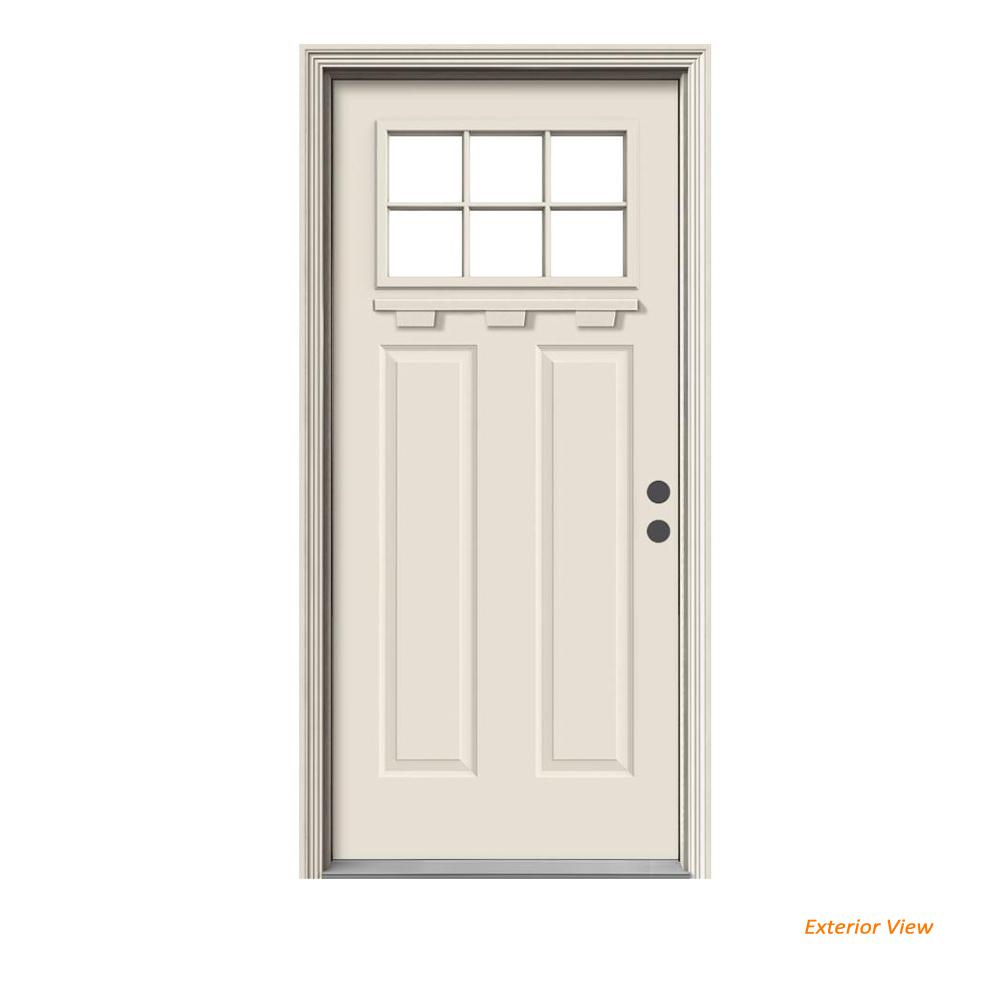
Steel, pre-hung. Home Depot $490.

Frank Lumber, "The Door Store."

Frank Lumber.


I'm willing to consider other styles, perhaps mostly glass, or even solid/panel with no glass. It doesn't have to be Craftsman, but I think that would work.

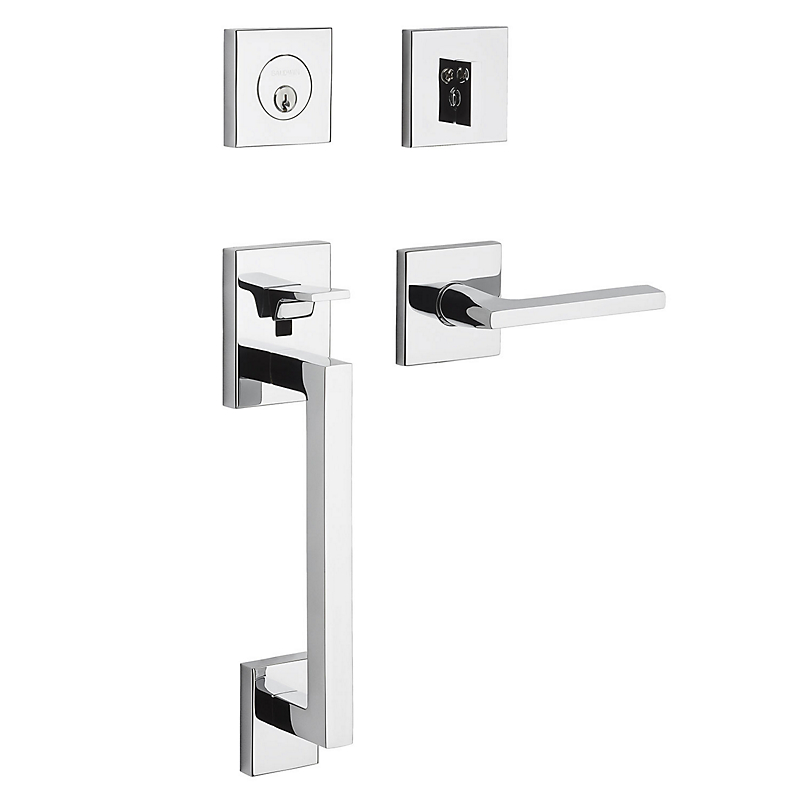
As for hardware, Baldwin calls this Minneapolis sectional (as opposed to full or 3/4 escutcheon).
Picture it in Satin Black--the Baldwin site can't.
Single-lite seems insecure, but maybe it would have a reverse-psychology effect.
Frank Lumber, again.


Latest Deck Layout


Trex (or equiv.) needed (16) 8' boards, (36) 14' boards, and (14) 20' boards = 912 LF (~$4,560).

Note, 18' 6" is silly--make it 18' for the sake of the structure. Then, the 45-degree part is arbitrary. The Trex is almost the same if it was square, so we could enlarge the deck for little extra cost.

Picture horizontal cable railings (and the breezeway roof)

Gutters and Paint

The roof edge is damaged. The fascia board is not sound in places, and I'm not sure what the flashing situation is. The gutters are not well-anchored everywhere; they are dented; they fill with debris every few months; and they drip when it rains. As calculated earlier, it's 257 LF of gutter with 8 outside corners and 2 inside corners. The 8 downspouts are okay, but they are dented as well.
The green is now Acier and the ugly wires (upper left) are gone.
I would advise a client to remove all the gutters, replace rotted fascia, repair the roof edge, paint the fascia, paint the eaves, then install all new gutters with leaf guard tops, and only then paint the walls. An old bid from LeafGuard (tm) suggests new gutters would be $13,000. (Cheap vinyl gutters from Lowe's total about $600 in materials.) I am really reluctant to remove the gutters--just the demo and hauling is a big expense, and the gutters protect the house. It's a spring-loaded expense: Pay to remove them to increase pressure to spend even more money replacing them.

The question is: Are the gutters good enough if the plan is to make the house look attractive enough to sell? I think they are, with specific improvements. I need to add gutter guards, for one thing. Likewise, the eaves are in pretty good shape--they get the least exposure to the elements--and I want to leave them bright white.

There are two shades of blue (also, the darker blue is more semi-gloss)
The photo above illustrates the problem of designing a painting plan: What gets the main color and what will contrast? We have:

  • Vertical siding (Bright white)
  • Horizontal siding (Blue)
  • Chair rail (Darker blue)
  • Door/Window trim (Blue)
  • Garage doors (Bright white)
  • Garage door trim (Darker blue)
  • Downspouts (Blue)
  • Gutters (Blue)
  • Fascia board (Blue)
And bright white eaves.
Acier, with no contrast
The issue is: where do we want contrast in the exterior paint scheme? If we gray-wash everything, it's boring. I think the chair rail could be a pop of color--lime green, maybe--but I don't know about the roof edge, or the door/window trim. A classic is bright white with gray.

The garage doors represent an opportunity. Glass roll-up doors would instantly improve curb appeal, but they would cost $8,000, and the west-most door isn't needed.

A stake in the ground idea: Make the walls a neutral gray. Use a dark green for the chair rail, gutters and fascia, and a softer gray-green for the door/window trim. These elements will cast a green onto the neutral gray. Then hit the garage doors with a gray-green significantly lighter than the trim.

Okay, so this looks stupid. But I'm including it for the color swatches. 
It shows a two-tone wall, but that's just the original contrast
To play along at home, go to https://www.sherwin-williams.com/visualizer/. The Locator Number on the swatches correspond to the S-W color samples--each card is numbered sequentially, starting with 101, and the first color (farthest from the hinge) on each card is C1.

This is slightly different:
  • Vertical siding (Repose Gray SW7015 244-C1)
  • Horizontal siding (Repose Gray)
  • Chair rail (Overt Green SW 6718 149-C5)
  • Door/Window trim (Snowbound SW 7004 256-C2)
  • Garage doors (Spinach White SW 6434 270-C2)
  • Garage door trim (Overt Green)
  • Downspouts (Repose Gray)
  • Gutters (Overt Green)
  • Fascia board (Overt Green)
And bright white eaves.

Wednesday, April 1, 2020

Lighting the house numbers

Moving the house numbers to the kitchen wall makes it clear that this is one house. The main problem is that that wall is dark at night.
Lit-up house numbers
First plan was simple: Install an outdoor outlet, tapped into some basement circuit, then buy a low-voltage garden lighting kit, hang the transformer on the house and point a 12V light up at the numbers.

When I bought the outdoor outlet (weatherproof box, weatherproof cover, GFCI outlet, silicone sealant = $45.67 with tax; the outlet is $20), they were selling 120V LED spike lights. Transformers are ~$70, so $12 for the single light that I needed sounded good.
The only problem (and I have to admit I didn't think about this right away) is that the light would be on all the time. The timer was on the low-voltage transformer I didn't get.

The solution (for now) is to just wire the outlet to the post light power. Instead of a general-purpose always-on outlet, we'll have one that only has power dusk to dawn. If we go the low-voltage garden way later, we can convert this to always-on simply by attaching it to a basement outlet instead of the post light.

The underground feeder gets its power in this box. By attaching the new outlet here, anything plugged into the outlet will have power only at night. (By the way, you can see the original post light power cable (black) running above the box. I should probably remove that.

So, first night. 550 lumens is too bright, perhaps. It's a flood and maybe it should be a spot--we don't want to call attention to the gas meter and the eaves. (Maybe moving it farther away would help.)

The other problem is that the numbers are too high on the wall and too small.

Steps Project

I want to remodel the whole front yard. New hardscape, and so on. But at the moment, my path from the driveway to the house is only barely w...