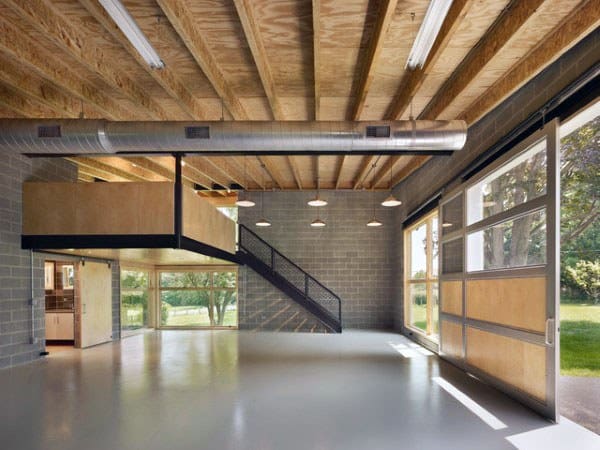
Monday, April 15, 2019

Taking It to the Next Level

I cleared off the loft (the bare wood floor they installed over the garage doors) and looked at the attic (the level above the Bedroom #3 ceiling. I have a million empty boxes. I may have to give them back to Goodwill. (Oh, and for those of you reading the saga...there were no "surprises" in the loft--just empty boxes and Christmas things.)
The loft (looking west). The white packets are rodent repellent. The roof is insulated except for the two bays at the center.
I bought a $12 halogen worklight that gets really hot. I can see why people like the $40 LED lights. There's a tear in the insulation backing (at about the center of the photo above) that I think I can fix with duct tape.
The loft (looking east. I don't have a clue why they installed drywall on the right--it makes it difficult to get anything into or out of this alcove. That's the electric service mast in the distance at the right, btw.
I still haven't walked on the Bedroom #3 ceiling because it's hard to get to with the 8' ladder. I have a telescoping ladder that will provide better access. We seem to have a box of fluorescent bulbs up there, along with an empty box I tossed. I took down the chin-up bar (except for the pulleys attached to the rafters) and discovered that we were pulling against 25# of weight. The weights were bought at Goodwill for $2 each.
The attic (looking at SW corner). Surprised to find a proper outlet wired in. Sadly, no insulation at all.
The attic, looking at SE corner, with the slightly lower ceiling of Bath #3. The pipe in the foreground was a guide for the chin-up bar rope. What looks like dust in the foreground is very dusty carpet padding.
The "roof" of the closet is a table top of some kind and it's attached.
The roof of the closet. The perforated angle shown here seems to be extra, which I need because there are 3 angles holding up the garage door tracks and one track held up by a bungee cord.
Want to know what's highly illegal and likely to cause a fire? Using an extension cord to power 240W worth of fluorescent lights and then deciding that you want a real switch, so you cut the extension cord and wire in a switch. That's not dangerous enough. Let's do the splicing in the wall and cover it with 1/2" blue styrofoam.
This is what it looks like. The switch is perfect. The wires are not rated for inside the wall, but we can overlook that. The parts that's dangerous and illegal is making connections in the wall. 
I'm starting to think that the whole workshop is powered from an extension cord plugged in at Bath #3. The problem with new circuits is you have to run wire all the way back to the panel. In this case, the panel is 8" from the open studs. <shaking my head>

Sunday, April 14, 2019

A Good Day's Work

I hope I never see another cobweb, but of course, the basement looms. I have some good orderly piles around the house--painting supplies, long-handled tools, the steel shelving units--and some messy piles that need sorting. I found my conduit bender, though!

Both doors are operable; the west door (right) has a loop of  wire keeping it from opening all the way.
Next step is to clear out the loft (the area above the garage doors). I have the Christmas things up there in plastic tubs; I may just move them to the basement, and I have a number of empty boxes which move easily. Anything else will be a surprise. :-)

After the loft, I'll move on to what I call the Attic--the plywood platform above Bedroom #3. I put a couple of things up there, the hanging weights for the silly chin-up bar are still there, and I think they left me some odds and ends. There's no good lighting, nor headroom, so I'll be exploring.
The gray on the right is cardboard; the blue on the left is styrofoam. Out they go.
The wiring is a bunch of extension cords and plug strips. The fluorescent lights are dangling precariously. After I've cleared out the loft and the attic, I'll pull off the blue styrofoam and track down the origin of the power for the light switch. (The light switch is on the hinge side of the door, so I'll move it to the other side.)
I'm pretty sure this is the insulation that some critter was nibbling on and dropping in the BA3.
The counter is a patchwork; I may want to deal with that. I want to install 2x4 blocking, then bring the insulation up to R-13. I decided I don't want to gyp board the underside of the rafters. I'd like it done, so I'll get bids, but I may just leave it. But I will do drywall up to the plate line.

Blocking, then insulation. (Not sure what the sheet plastic is about.) Then electrical--there's a security light on the west side that needs to be connected. There's a 20A circuit for BR3/BA3, but the garage lights and extension cords are on a 15A circuit. I think I'll use the 15A circuit, but use Romex stapled to the framing and real junction boxes instead of the dangling plug strips.
Hello! Welcome to Papa's Place. How May I help you?
The top of the upper cabinets has a large hole for the dust to get in. Once the blocking, insulation, and electrical are in, I'll drywall. I think I'll have to ask John Jones to get the 4x8 sheets home. The plan is to tape, mud, and sand the drywall, but not perfectly. Then I'll hit everything--walls, cabinets, plywood walls, doors, columns, loft--with Zinsser 1-2-3 primer. I haven't decided whether to paint the overhead door hardware something contrasting, like gloss black.
The door hardware is black--I want everything else primer white. Notice the piecemeal drywall at the center.
I want to prime the particleboard shelves for the steel shelving units, too. I may hit the shelves with a gloss gray (that's what the steel supports are).

Before everything moves back, I'll epoxy coat the floor.
The east door track has perforated steel supports. The west door track is screwed to the post and held up by a bungee cord on the west wall. This is the Plan B location for the 8' ladder, by the way.
For comparison.


The Garage Door Problem

I have a preliminary Plan "A" for the garage that includes using the steel shelves (sorry, Tanya and Kevin). I realize that I have a lot of white bankers' boxes of stuff, and those shelves can absorb 30 each.
Gardening on one side, woodworking on the other, with the shelves for storage
I realized that there is only one place for the 8' ladder to go, but I also discovered that the unwieldy weed whacker and blower can both be hung on the wall. I'll make the existing open shelves on the existing cabinets my power tool barn, and the Ryobi battery charger can go right on that wall, along with my nail/screen organizers. One shelving unit narrows the passage to 30", but it's only a 30" door and with the ability to open both overhead doors for big projects, I think I'm okay.
Looks like a pretty straightforward design. Very little investment in fanciness.
This is why you draw plans. I realized (pretty quickly, but not quickly enough) that the overhead garage doors are doing something weird--they aren't just closed or open. When they pivot, they would hit the shelves. So, of course, I needed to study the situation more closely.
The door is held up by a wheel in a track at the top and a 1-1/2" angle from a mid-pivot to a bracket near the floor.
While I was at it, I confirmed the details of the door construction (1x T&G siding on a flat 2x4 frame), the casing (2x6) and trim (1-3/4" x 1-3/8" brick mold). Through what we architects call "geometric construction" (we can't do the math so we draw it to scale), I see that a 5' 9" tall shelving unit needs to give the door 12" of clearance (and we shouldn't count on putting boxes on the top shelf, so 24 boxes per unit, not 30).

If I want to stick with Plan "A," I have two choices. A1: Only use one shelving unit and slide it south, out of the way of the door. I can't do that with the other unit, in the middle of the room, because it would make the 30" even tighter. A2: Don't plan to open the west-most door, and use both shelving units as planned.

A2 isn't as crazy as it sounds--the west-most door doesn't work as well as the east door, and I could move the miter saw to the other bay.

I noticed another problem: Working at night with the door open, there's no light in the two bays under the loft. Doors closed, the lights under the loft (TBD) will work just fine. A standing work light solves the problem, but I'd prefer a cleaner solution.

The thing is, the only problematic things to fit in are the 8' ladder and the shelving units, and they don't seem to fit other places. (If I put a shelving unit on the east wall, I have to deal with the 3" offset--that would make a gap between the shelf and the wall.)

Update: Here's Plan 'B' with the shelves turned. The east-most shelving unit can move north to give more room at the doorway. This looks good, too.
Plan "B" with the shelves turned and a cheap bookcase for miscellaneous outdoor things

The garage door jamb in the center with the teeny brick veneer
Head of the garage door showing the wheel in the "J"-track and the brick veneer beyond


Friday, April 12, 2019

Things in the Garage

Getting the stuff out of the garage so that I can work on it, I'm making a list of things that I might not want anymore. Also, I want to have an idea of what the finished garage will have in it and what I'll permanently store elsewhere.

Things maybe I don't want:

  • (2) 18" deep x 5' 9" long x about 6' tall steel and particleboard shelving units
  • (6) Aluminum patio chairs with faded green tie-on cushions
  • Upper Cabinet - 3' w x 1' 3" h x 1' deep
  • Weighted umbrella base
  • Yellow Umbrella
  • Bell foot pump (for bicycle tires)
  • The Mid-Mod plastic chairs I bought 2 years ago, thinking I'd repaint
  • 1 or 2 CD/DVD shelf units
  • Gorilla Cart, sells for $80 on Amazon
  • Old Prius floor mats - Goodwill? Driver's mat has a hole worn in it
  • Broken weed wacker - Goodwill?
  • (6) Chevron 5W-30 1 quart motor oil, sells for $68.88 at Walmart
  • (5) Chevron Pro-Gard Fuel Injector Cleaner 16 fl. oz.
Maybe it's time to put some things in the east side yard shed that I've never visited? The plastic chairs, for example. [No, I put the plastic and aluminum chairs on the back deck.]

Finished Workshop
  • (4) Nail/Screw sorters (mount on wall)
  • Ryobi battery charger (mount on wall, or counter with outlet)
  • Power Tools
    • Ryobi set
    • Sander
    • Hammer Drill
    • Drill
    • Grinder
    • Makita Chop Saw
    • Table saw??
  • ShopVac
  • Hand Tools
  • Long-handle Tools - push brooms, sledge hammers, conduit bender
  • Levels, pry bars
  • Paint
    • Brushes, Rollers, Roller Pans
    • Drop Cloths
  • Ladders
  • Gardening
    • Weed Whacker
    • Blower
    • Tree Saw
    • "Snow" shovel
    • Gloves
    • Garden shovel, Rake
    • Loppers
  • Storage
    • Albums
    • Wires, connectors
    • DVDs
    • CDs
    • Christmas

Thursday, April 11, 2019

Lighting the Garage

Paint the surfaces and install new lights and the workshop will be much more inviting.

This is how I see the finished workshop
It's 180 SF, so to light it as we would a kitchen sink, we need 75 lumens per SF, or 13,500 lumens in the garage.

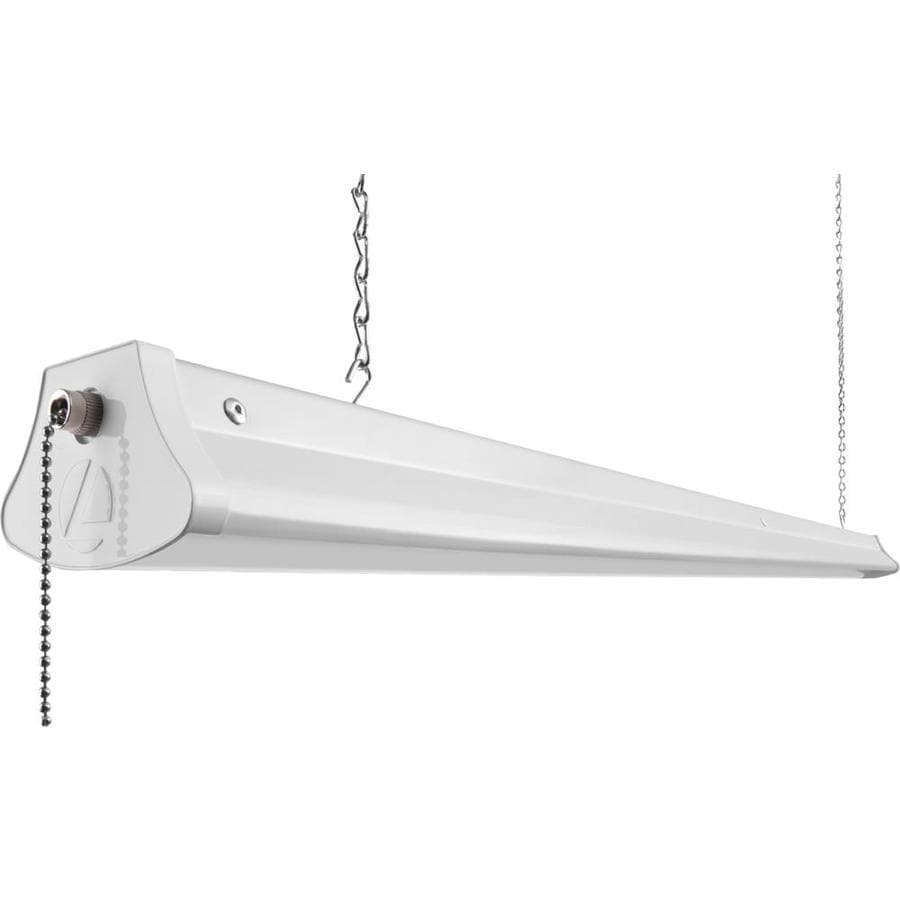
Lowes sells the Lithonia 1290L Shop Light for $35. Four of them (two on chains and two under the loft) would be 3100 lumens x 4 = 12,400. (They consume 28W x 4 = 112W.)

The current situation is (6) 40W T12 fluorescents (3 are burned out) for a total of 240W and 15,000+ lumens.

There are low profile downlights that would work under the loft. Sunco makes a model that uses an 11W BR30 bulb that produces 850 lumens. Under the loft is 95 SF, so we want 7,125 lumens. 10 of the Sunco units would be 110W, 8500 lumens. They're about $10/can by the dozen. The bulbs are $3.10. The recessed cans have TP24 connectors and the bulbs are standard screw in.

10 recessed cans under the loft, 3 hanging shop lights over the remaining 85 SF. That would be about 9000 lumens in the high ceiling and 8500 lumens under the loft. $140 for the downlights and bulbs, $105 for 3 shop lights - $245. (I allowed $150 for 3 new fixtures in the first budget.)

Revit view of proposed lighting, sort of.
The downlights would be simpler and just recessed cans, not sticking down. The 1x4 fluorescents would be tube shop lights. To make Revit allow the shop lights to hang in the air, I had to create a glass ceiling, which is why we see a reflection of the loft and why we don't see the rafters, which are there (they are in the dark). Also, I didn't bother with the upper cabinets.

Wednesday, April 10, 2019

Tackling the Garage

This time I know Peggy is right. Fix up the garage so that it's an attractive workshop and I'll get my money back when it's time to sell.

Update: Here's a good article on small workshops.

The list of improvements, after clearing out the junk, is straightforward and finite:
  • Fix the west overhead door--it's likely nailed closed
  • Remove the blue EPS somebody thought was as good as wallboard
  • Install R-13 fiberglass batts - [Rafters are 480 SF, some walls = 7 32' rolls $22.13 = $155]
  • Hardwire electrical to get rid of the extension cords and other mess--the electric panel is right there; this shouldn't be difficult. [Romex 100' $59.47, 10 jboxes @ $2 = $20, 10 outlets $5. New fixtures 3 @ $50 allow. = $150]
  • Install drywall, rough tape and sand--walls, ceiling under loft and attic rafters [Rafters 480, some walls 3/8" gyp. bd 15 @ $11.62 = $175]
  • Paint/treat the bare wood garage doors, headers, loft, and plywood at closet
  • Paint the drywall
  • Paint the cabinets
    ["Paint" might be water-based Zinsser Bullseye 1-2-3 Primer - 790 SF = 2 gallons @25 = $50]
  • Install storage/shelves/hangers, workbench (to be designed)
  • Paint the floor [Epoxy-Seal $32.48]
Rough budget: $647, $712.30 including 10.1% sales tax.

Here are the before photos:
I may want to refine this area as an AirBnb entry and partition off the workshop

Recessed lights in the loft floor, then gyp board

The existing cabinets are in great shape. I'll probably want more of a work table, though. The little refrigerator in the lower left has to go--or, I guess, maybe be replaced.

They put up this much drywall and stopped. Makes no sense--you can't get to that end of the loft.

The area above the apartment should be storage, too--it's got a plywood floor--but it has no lights and no insulation

This is the west wall--just need to put in some R-13 batts and drywall it.

Blue EPS doesn't accomplish a darn thing. It's gotta go. Also, why is the back of the closet plywood? I'll leave the plywood for mounting hooks and things, but drywall the rest
Livonia 4' LED shop light $35 at Lowe's
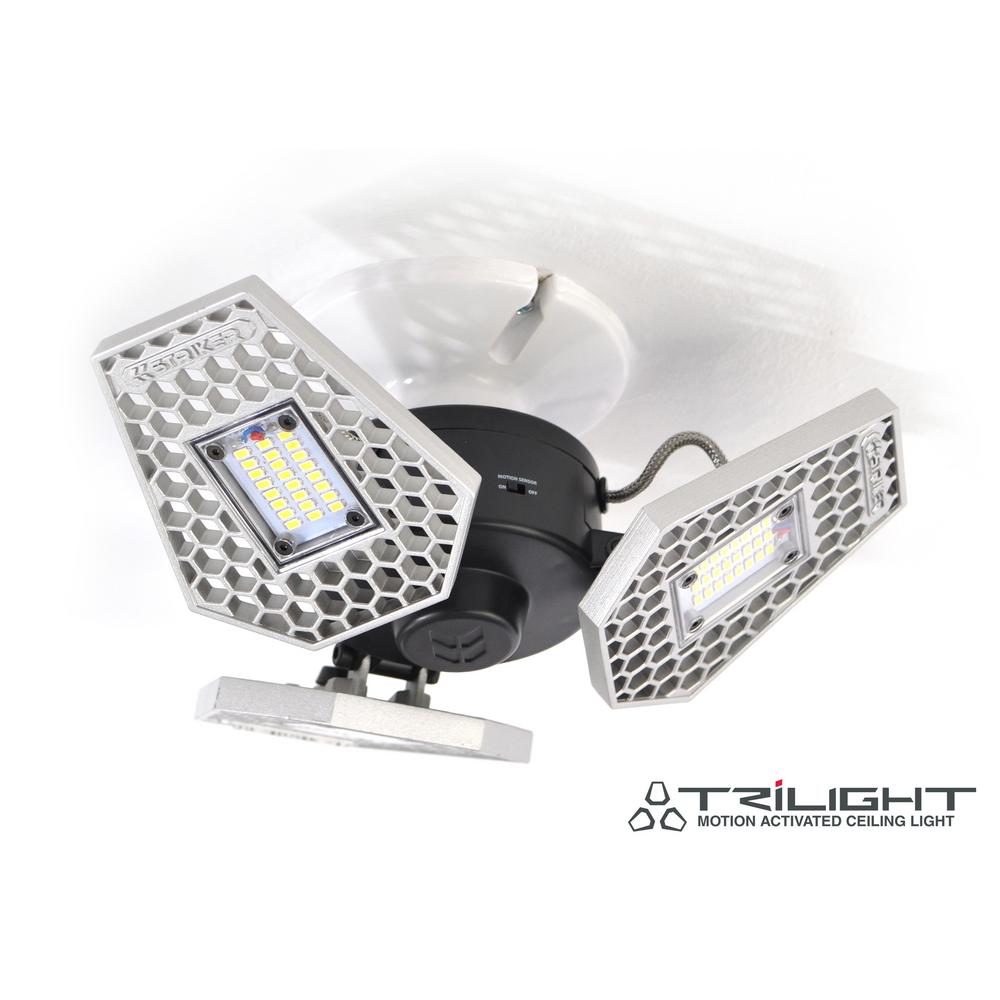
Striker motion-activated ceiling light $129 at Home Depot (maybe for attic and loft areas?


Monday, April 8, 2019

Breezeway meets Garage

(Not sure why I didn't publish this a week ago, but better late than never.)

Here's how it looked in October 2014:
The inspector snapped this--he thought there was likely a service ground in there somewhere.
The gray concrete path was removed when the oil tank was removed, and the gray Trex step and landing are just loose at the moment. Last week:

Wish the brick wasn't pulling away from the wall--it's not loose where I could push it back.

Steps Project

I want to remodel the whole front yard. New hardscape, and so on. But at the moment, my path from the driveway to the house is only barely w...