Friday, April 12, 2019

Things in the Garage

Getting the stuff out of the garage so that I can work on it, I'm making a list of things that I might not want anymore. Also, I want to have an idea of what the finished garage will have in it and what I'll permanently store elsewhere.

Things maybe I don't want:

  • (2) 18" deep x 5' 9" long x about 6' tall steel and particleboard shelving units
  • (6) Aluminum patio chairs with faded green tie-on cushions
  • Upper Cabinet - 3' w x 1' 3" h x 1' deep
  • Weighted umbrella base
  • Yellow Umbrella
  • Bell foot pump (for bicycle tires)
  • The Mid-Mod plastic chairs I bought 2 years ago, thinking I'd repaint
  • 1 or 2 CD/DVD shelf units
  • Gorilla Cart, sells for $80 on Amazon
  • Old Prius floor mats - Goodwill? Driver's mat has a hole worn in it
  • Broken weed wacker - Goodwill?
  • (6) Chevron 5W-30 1 quart motor oil, sells for $68.88 at Walmart
  • (5) Chevron Pro-Gard Fuel Injector Cleaner 16 fl. oz.
Maybe it's time to put some things in the east side yard shed that I've never visited? The plastic chairs, for example. [No, I put the plastic and aluminum chairs on the back deck.]

Finished Workshop
  • (4) Nail/Screw sorters (mount on wall)
  • Ryobi battery charger (mount on wall, or counter with outlet)
  • Power Tools
    • Ryobi set
    • Sander
    • Hammer Drill
    • Drill
    • Grinder
    • Makita Chop Saw
    • Table saw??
  • ShopVac
  • Hand Tools
  • Long-handle Tools - push brooms, sledge hammers, conduit bender
  • Levels, pry bars
  • Paint
    • Brushes, Rollers, Roller Pans
    • Drop Cloths
  • Ladders
  • Gardening
    • Weed Whacker
    • Blower
    • Tree Saw
    • "Snow" shovel
    • Gloves
    • Garden shovel, Rake
    • Loppers
  • Storage
    • Albums
    • Wires, connectors
    • DVDs
    • CDs
    • Christmas

Thursday, April 11, 2019

Lighting the Garage

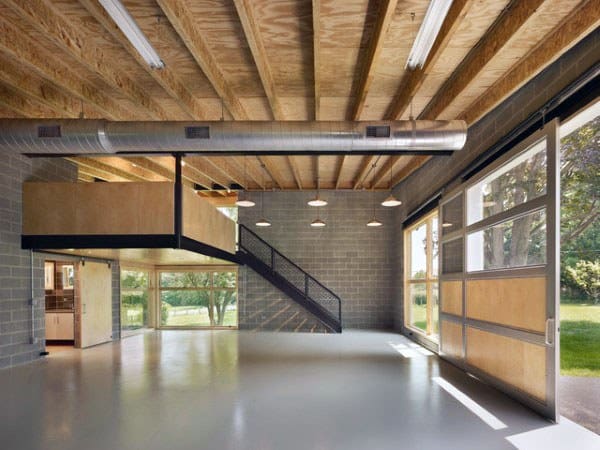
Paint the surfaces and install new lights and the workshop will be much more inviting.

This is how I see the finished workshop
It's 180 SF, so to light it as we would a kitchen sink, we need 75 lumens per SF, or 13,500 lumens in the garage.

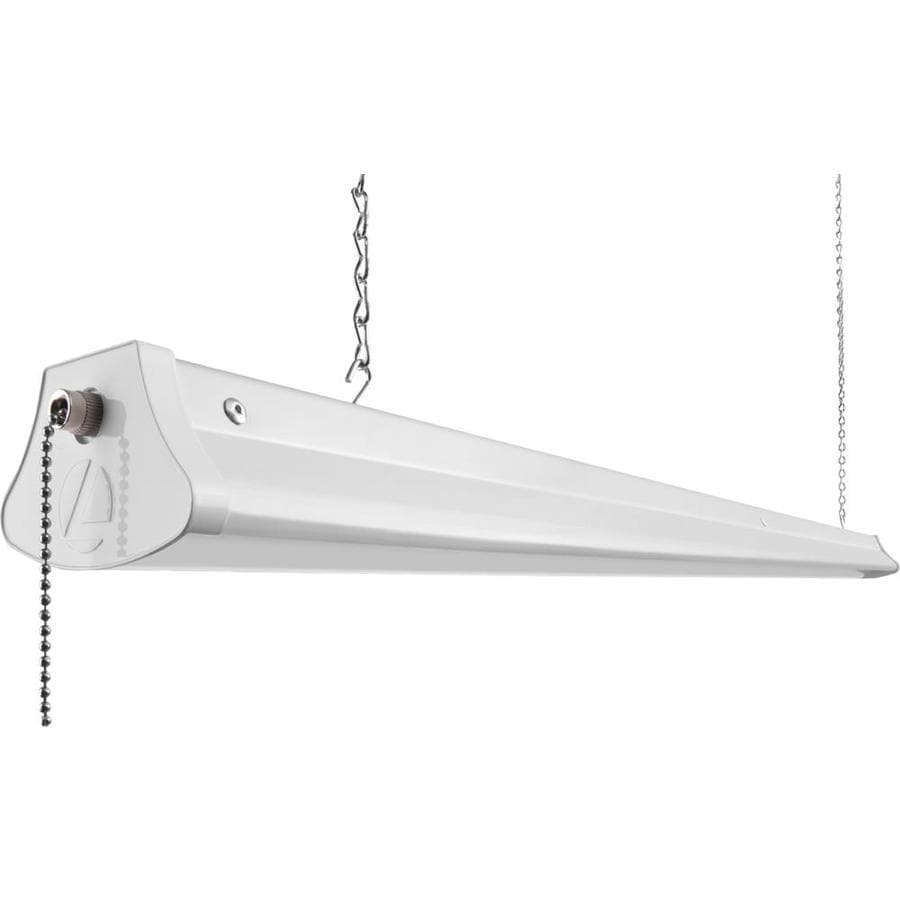
Lowes sells the Lithonia 1290L Shop Light for $35. Four of them (two on chains and two under the loft) would be 3100 lumens x 4 = 12,400. (They consume 28W x 4 = 112W.)

The current situation is (6) 40W T12 fluorescents (3 are burned out) for a total of 240W and 15,000+ lumens.

There are low profile downlights that would work under the loft. Sunco makes a model that uses an 11W BR30 bulb that produces 850 lumens. Under the loft is 95 SF, so we want 7,125 lumens. 10 of the Sunco units would be 110W, 8500 lumens. They're about $10/can by the dozen. The bulbs are $3.10. The recessed cans have TP24 connectors and the bulbs are standard screw in.

10 recessed cans under the loft, 3 hanging shop lights over the remaining 85 SF. That would be about 9000 lumens in the high ceiling and 8500 lumens under the loft. $140 for the downlights and bulbs, $105 for 3 shop lights - $245. (I allowed $150 for 3 new fixtures in the first budget.)

Revit view of proposed lighting, sort of.
The downlights would be simpler and just recessed cans, not sticking down. The 1x4 fluorescents would be tube shop lights. To make Revit allow the shop lights to hang in the air, I had to create a glass ceiling, which is why we see a reflection of the loft and why we don't see the rafters, which are there (they are in the dark). Also, I didn't bother with the upper cabinets.

Wednesday, April 10, 2019

Tackling the Garage

This time I know Peggy is right. Fix up the garage so that it's an attractive workshop and I'll get my money back when it's time to sell.

Update: Here's a good article on small workshops.

The list of improvements, after clearing out the junk, is straightforward and finite:
  • Fix the west overhead door--it's likely nailed closed
  • Remove the blue EPS somebody thought was as good as wallboard
  • Install R-13 fiberglass batts - [Rafters are 480 SF, some walls = 7 32' rolls $22.13 = $155]
  • Hardwire electrical to get rid of the extension cords and other mess--the electric panel is right there; this shouldn't be difficult. [Romex 100' $59.47, 10 jboxes @ $2 = $20, 10 outlets $5. New fixtures 3 @ $50 allow. = $150]
  • Install drywall, rough tape and sand--walls, ceiling under loft and attic rafters [Rafters 480, some walls 3/8" gyp. bd 15 @ $11.62 = $175]
  • Paint/treat the bare wood garage doors, headers, loft, and plywood at closet
  • Paint the drywall
  • Paint the cabinets
    ["Paint" might be water-based Zinsser Bullseye 1-2-3 Primer - 790 SF = 2 gallons @25 = $50]
  • Install storage/shelves/hangers, workbench (to be designed)
  • Paint the floor [Epoxy-Seal $32.48]
Rough budget: $647, $712.30 including 10.1% sales tax.

Here are the before photos:
I may want to refine this area as an AirBnb entry and partition off the workshop

Recessed lights in the loft floor, then gyp board

The existing cabinets are in great shape. I'll probably want more of a work table, though. The little refrigerator in the lower left has to go--or, I guess, maybe be replaced.

They put up this much drywall and stopped. Makes no sense--you can't get to that end of the loft.

The area above the apartment should be storage, too--it's got a plywood floor--but it has no lights and no insulation

This is the west wall--just need to put in some R-13 batts and drywall it.

Blue EPS doesn't accomplish a darn thing. It's gotta go. Also, why is the back of the closet plywood? I'll leave the plywood for mounting hooks and things, but drywall the rest
Livonia 4' LED shop light $35 at Lowe's
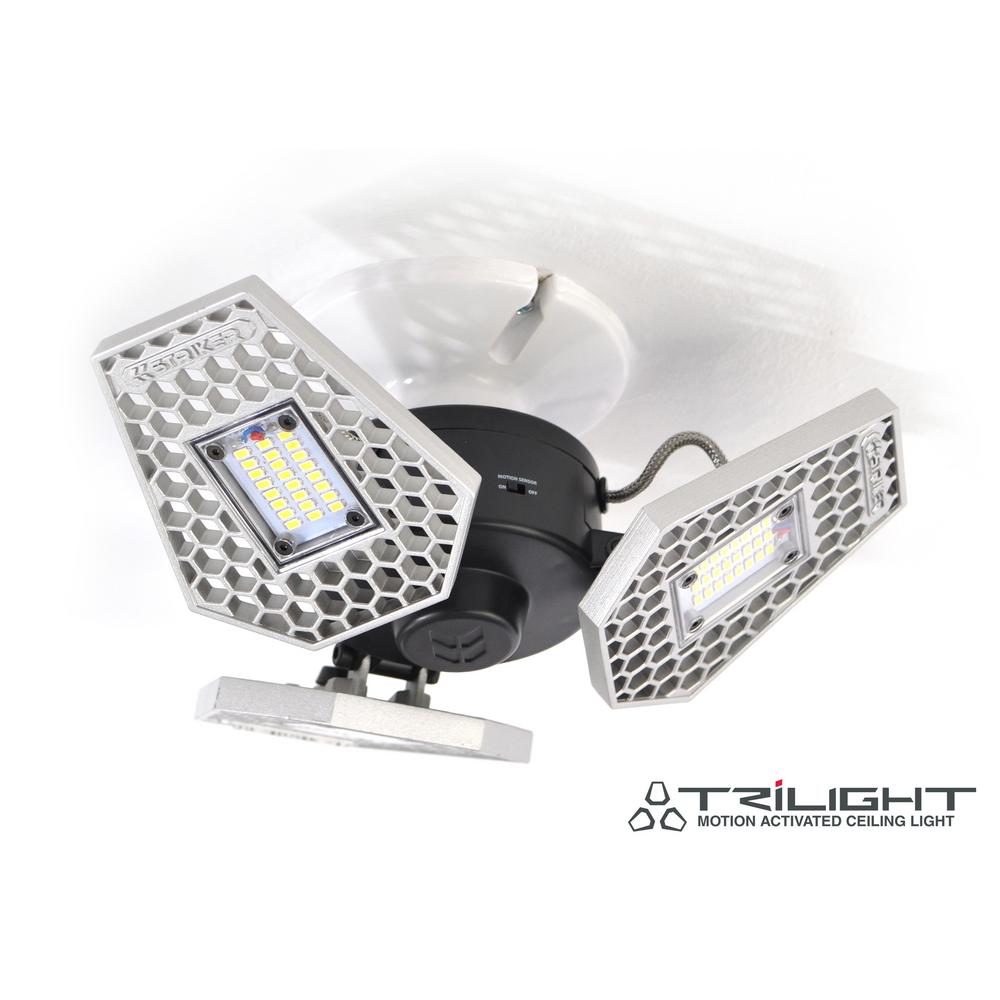
Striker motion-activated ceiling light $129 at Home Depot (maybe for attic and loft areas?


Monday, April 8, 2019

Breezeway meets Garage

(Not sure why I didn't publish this a week ago, but better late than never.)

Here's how it looked in October 2014:
The inspector snapped this--he thought there was likely a service ground in there somewhere.
The gray concrete path was removed when the oil tank was removed, and the gray Trex step and landing are just loose at the moment. Last week:

Wish the brick wasn't pulling away from the wall--it's not loose where I could push it back.

Choosing Exterior Colors

It turns out there is advice on choosing exterior colors on YouTube. Sherwin-Williams says choose larger to smaller: Roof, Walls, Garage Doors, Front Door, Trim. It's the old "fit in/stand out"--the SW video says the goal is to make your home the best buy in the neighborhood.

Jesse, the Idaho Painter, sounds like the painter from Mr. Blandings. "Right now, it's the grays and whites and we'll probably see that for four to five years." And on the inside, what's popular now is the pure white. "Pure white trim, pure white walls, or a gray, some grays with white trim. It doesn't look so good with a whole lot of colors, but the grays look good if all the trim is all white and then you'll have one gray or two to three other grays." "You want to break it up a shade lighter or a shade darker so it's not all just one color."

Cindy, the Paint Diva of New Jersey, thinks the front door is the focal point, just like the fireplace would be in a room. She sells Benjamin Moore, where the go to wall color is "Briarwood" (a gray-green).

Roofs are warm (white, tan, brown, red) or cold (black, grey, green, blue) and contrasting the wall color makes the roof seem separate. That is, a blue house with red roof will look wrong--the roof floats over nothing, the house, farther away, has no roof.

Wall colors are often suggested by the landscaping, the neighboring homes, the natural setting, or the history of the area. Don't paint a Colonial something odd. Darker colors seem farther away--use that to accent features. "Generally speaking, lighter colors will make a house seem larger." Vertical and horizontal color balance should also be considered--it's a composition.

Talking about regional variances, they group Maine and the "lush green" of the Pacific Northwest, saying that colors there are more muted than in Miami or the southwest desert. "Traditional shades mimic the slight blues, dusty reds, and gray-green tones of serene landscapes." Jesse says look at the houses on either side and across the street.

Using Victorians as an example, they say strong, contrasting colors can emphasize architectural features (like the brackets on Johnson), but a palette of similar colors unifies. Considering my house from the street, I'd say horizontal unity is pretty much assured--I need a palette of similar colors (using a single color looks flat, i.e., it lacks depth). Peggy is right, again.

Jesse talks about a big house that looks gray with white trim; he used three different shades of gray.

Then garage doors--because they're so large, they impact the overall effect. Jesse says go a shade lighter or a shade darker from the wall color.

Front door. Jesse says they're going really vibrant right now. Your lime greens, bright blues, etc. The front door is a place to pick up a particular plant color, or a brick or a rock. Match it or work with it like you would a throw pillow. The Paint Diva says it's about making the front door stand out. The house itself should be neutral, based on is the roof warm or cool. Classic red is fine.

Trim. Jesse uses a color called (he says) "Super White with No Tint." The Paint Diva uses "White Dove."

The Sherwin-Williams video turns to interiors and has some ideas based on the color wheel. They suggest using "Analagous Colors"--two colors next to each other on the wheel, like yellow and orange--for interior contrast. Or Complementary Colors--opposite each other on the wheel.

From the Sherwin-Williams video--mentions that the trend is cooler.

Also from Sherwin-Williams: You don't have to stick to beige. I thought the trellis on the ceiling was interesting.


Saturday, April 6, 2019

Paint Samples

I don't need to choose colors; there is a lot more planning and hard work to go before anything gets painted. But I looked into it enough that colors are in my head, a little. Also, playing around with tools and paint and such helps motivate me to clean out and organize the garage.

I had some good quality primer left over from the 2015 paint experiment. Zinsser Bullseye 1-2-3 is water-based, int/ext white primer. I bought a new sander and polished off the ivy crawlers on the siding visible out the kitchen window. The siding is actually in pretty good condition. I also bought a tube of DAP Dynaflex 230 latex caulk (never use silicone-based caulk if you expect to paint it, YouTube taught me). Priming the wall bright white increased the light level, but it did look a bit "whitewashed builder's flip."

So, instead of Conservative Gray, as I said on the color board, I bought a sample quart of Acier (SW 9170). The psychology of color still eludes me. I look at dark paint chips and they come out light; I look at light colors and they come out white. So I went with a fairly dark putty color. What the heck, it's just a sample.

As you'll recall from the Exterior Color post, I think the wood siding and the "chair rail" should all be the same color, because I don't like the high contrast bright white over dark blue it is now.

A few observations: Acier represents a nice putty gray (as opposed to a green gray or a brown gray). Acier is fine for a house, but it is too dark (LRV 32) for this north-facing, tree-shaded house. Also, seeing all one shade, I see that Peggy has been right all along--one shade says "cheap paint job."

Acier is not a bad house color, but my house needs more to keep it from looking dreary.
I kept the eaves the bright white they are now--they help bounce light inside, I think.


On the other hand, I was right to some extent as well: it almost looks like a slightly different shade horizontal to vertical. (As predicted by Mark's house on 9th Ave.)

Sherwin-Williams are nice folks to deal with. The quart of Acier cost $8.29 ($33.16/gallon is a big discount, I think). I like the hue of Acier (it seems earthy enough to go with the brick, to me), but it needs to be lighter.

Repose Gray (SW 7015, LRV 58) might be a better shade. I wonder if I should go with Repose Gray for the lower, horizontal boards and the "chair rail," and use an off-white (e.g., Eider White SW 7014, LRV 73) on the vertical boards, with a screaming white on the trim. Eider White is a coordinating color with both Repose Gray and Acier.

If I go with a very light on the vertical boards, I would just continue it onto the eaves. As it is, I left the eaves bright white for now.

As an experiment, I filled in the V-groove gaps on the vertical siding with caulk and left those closer to the electric panel "natural." The caulk looks much more polished.

Update 4/7/19: Maybe we keep the Acier lower and go with Repose Gray above.

I think the experiment shows gray hue good; some contrast between upper and lower good; Acier too dark. I don't have any Repose Gray paint, but here are the color chips:
LRV 73 over LRV 58 will be a lot lighter than LRV 32

Continuing my experimental mood, I framed out part of the living room ceiling and tried painting the walls and ceiling (and my trim boards on the ceiling) with Eider White. I left the trim gloss white and the north wall Glidden "Blue Grey Sky."
I like the bright white trim against the Eider White wall, and I think the scaled-down crown molding really works to lift the ceiling. 
The molding at the ceiling is a simple 1/4 cove--I like that best--and at the wall, it's a too-small bead. I would put 1/4 cove at the wall, too, I think.

Obviously, the Blue Grey Sky (the medium shade in the 2015 experiment) is way too high-contrast. The plan had been to cover every surface except door and window trim (and maybe a chair rail where occurring) with Eider White in Satin finish.

Acier doesn't look too dark in context. I ain't got no good color sense.

Monday, April 1, 2019

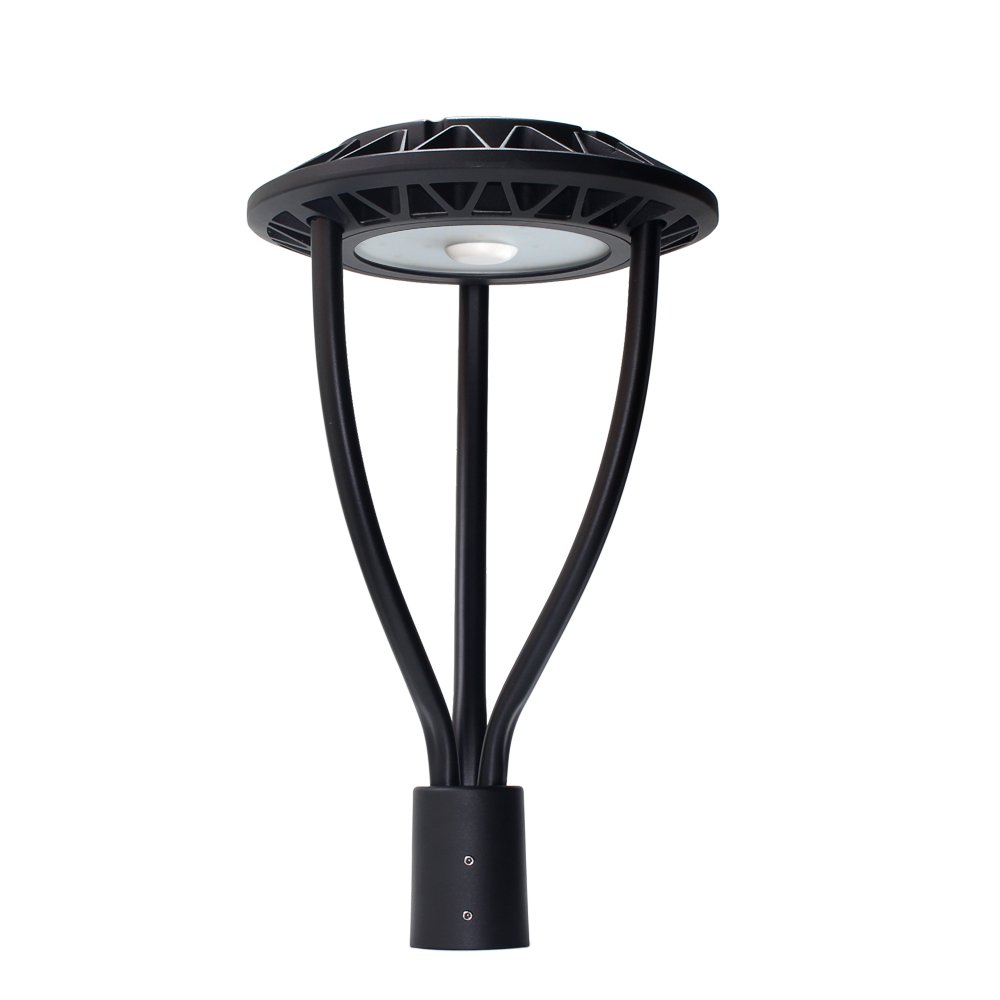
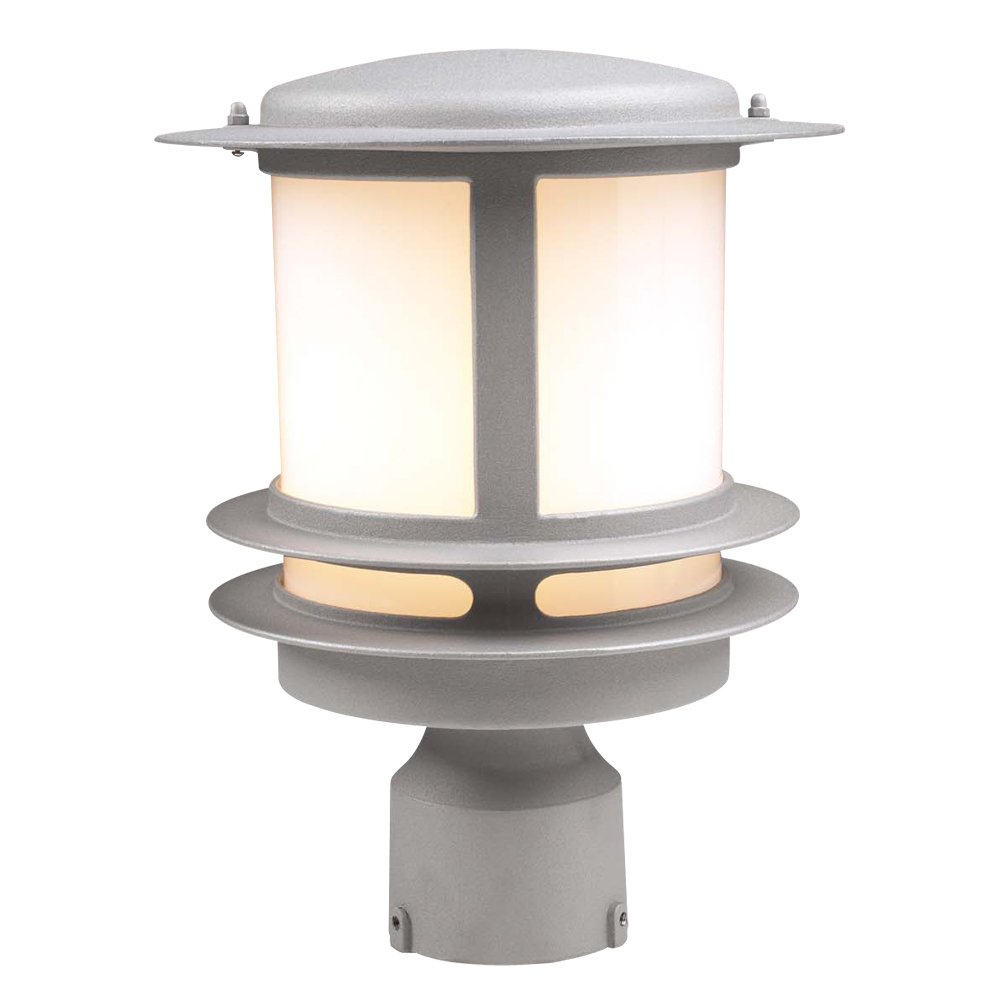
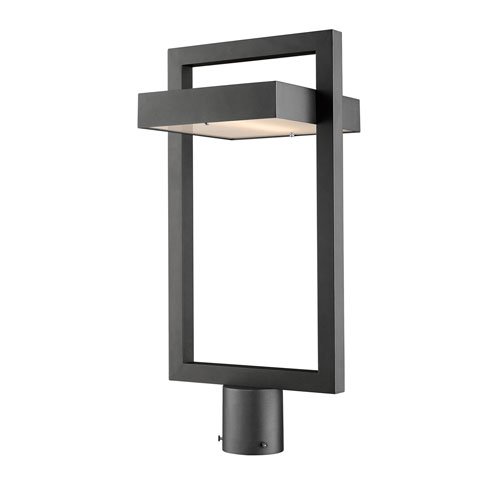
Post light

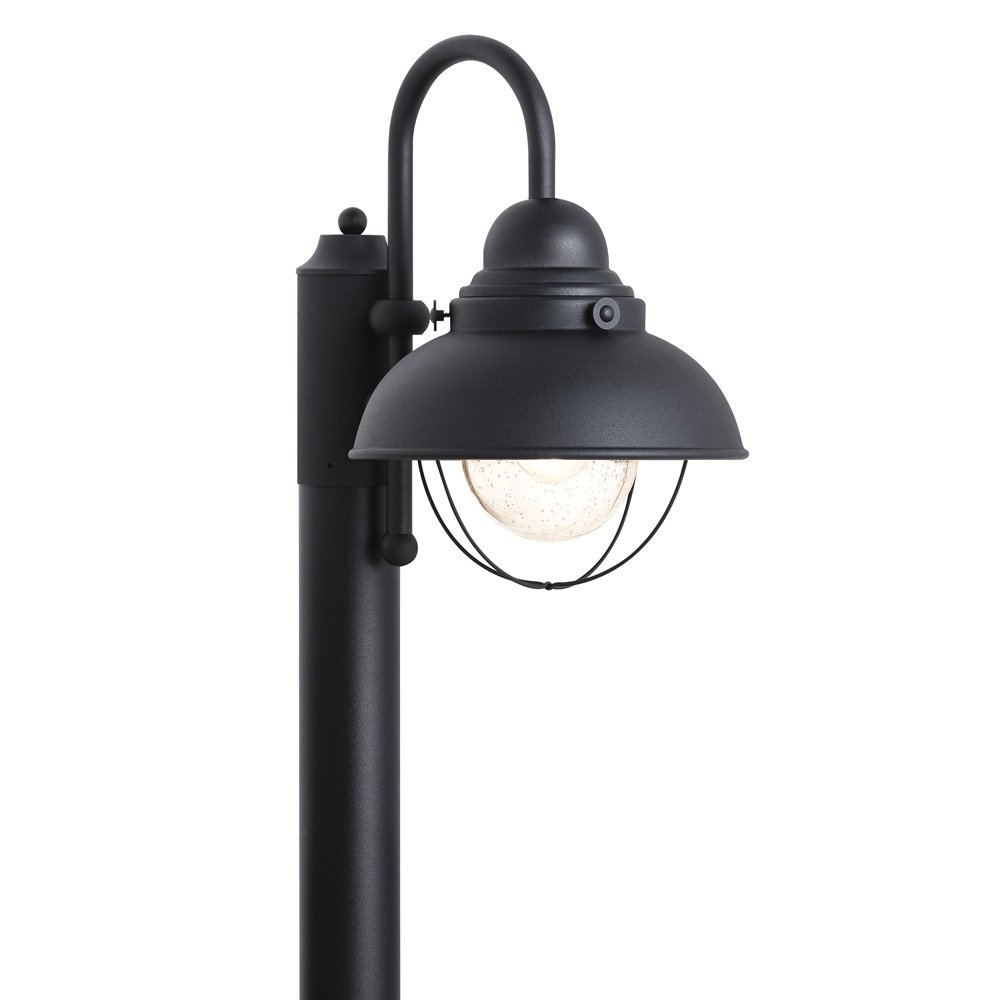
It looks like the post light will be doable. It's a standard 3" O.D. pipe and it's in good shape. The light fixture seems in good shape, so sticking with that is Option A. But it's an opportunity to, right out the gate, as it were, set a different tone for the house.

Remind folks that the Sound is 1/2-mile away
Traditional
Let 'em know this is an alien-designed house
It doesn't have to be black
Modern, with a little less spaceship
Kichler Cast Aluminum
One of the reasons I did this quick search was that I wanted them to tell me that they had an on-at-dusk, off N hours later circuit. Nope.

That's an extra-cost gizmo ($10) that will require drilling a hole in the post. These products turn off at dawn.

I can't find something that turns off at midnight. Maybe it stays on all night; that's what my porch light does at the moment.

The installation will be pretty simple. UF-B wire (14-3) is a pain to work with--you strip it with a knife and it doesn't bend easily. I'll feed it down the post, bend it at the bottom, and dig a 12" deep trench next to the front walk for it.

At the house, I'll drill through the rim joist (as they did for the gas line) and install a 1/2" galv. conduit with a condulet outside and galv. running into the ground.

On the basement side, I'll mount a j-box to the galv. conduit and terminate the UF-B wire in the box. I'll figure out which circuit to tap into in the basement and run simple Romex (14-3) to the indoor box. This new run needs GFCI, so I'll install a GFCI outlet in the basement ceiling--over where I tap in, since that will be more useful, or out at the rim joist.

Oh, alright, fine. I should install a duplex outlet behind the brick monument. More galv. into the ground--one bend bringing the wire into the outlet, a second bringing the wire out to the post light.

Steps Project

I want to remodel the whole front yard. New hardscape, and so on. But at the moment, my path from the driveway to the house is only barely w...