Sunday, August 30, 2020

Steady progress

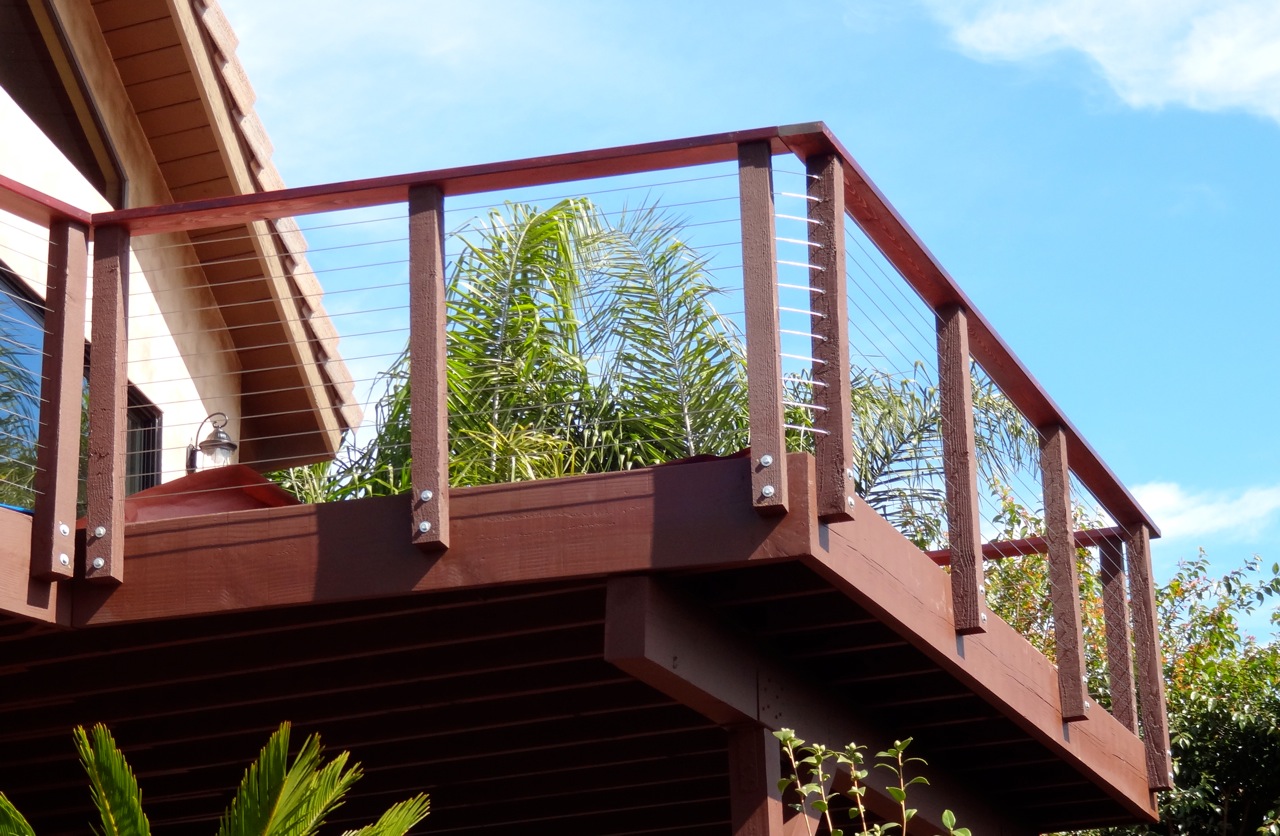
 It's Sunday, so...here's a progress report. It's going. 


Second coat of black stain really helps. The Fiberon handrail/cap is in place everywhere. Moved the patio light connect at the SW corner.

Sunday, August 23, 2020

Quiet Week

Well, it's Sunday night again. I feel like I've been hardly working on the backyard. It started raining Wednesday night, persisted (sort of) on Thursday and a bit on Friday. I could have done lots of work in the dry times, or when it was just misting, but I just didn't feel like it. The lights dangled for a few days.

On Saturday, I hung the rest of the lights on the wire supports: 12 on the first (west-most) line, 11 on the middle, and 11 on the east-most line. I'm thinking I'll make that 11-12-11 by moving a light at the southern-most (spindly pine) tree.

I wonder where I got the idea that I could string the lights without wire supports? Could it be the sales material? Well, anyway, the $35 kit worked out just great--vinyl-coated, stainless steel cable with beautiful stainless steel fittings and turnbuckles. The connector at the southwest corner has to change, though--the wire is rubbing against the house, because I foolishly mounted it out of sight around the corner.

Sunday, I cut the remaining handrail pieces for the lower deck, including the sloping stair handrail. Making and fitting a template handrail out of salvaged lumber was a master stroke. The miters were wrong when I first cut them, and some had to be re-done twice. But when they were right, I had the precise angles and lengths so cutting the Fiberon handrails was easy. Also, I cut the end returns a couple of weeks ago--that was very tricky, because they come to a knife edge on two sides. So I super glued the returns on the cut boards and we're good to go on the handrails.


What that means is that this week I'll paint the undersides and ends (two coats) and I'll glue them down when I'm ready. One issue with the upper handrails is that the miters must stay in the same plane. I bought some metal corner angles to install on the underside and we'll see how that works.

This project is nearing completion.

  • Give the railings a second coat of black stain (may need more black stain)
  • Install the angled cable rail on the lower stairs; it will be tricky
  • Glue the handrail on the angled stair railing
  • Glue the handrail on the other 5 sections
  • Buy parts and install electrical for the lights
  • Misc fixup--add blocking under unsupported deck end; add deck screws where needed; cut sharp corner of upper tread
  • Install the remaining cable rail (7 panels x 8 rows)--112 pilot holes, 112 holes, 112 lag screws
  • Move the wood piles to the front (side) yard
  • Solve the basement stairs (a project in itself--to the drawing board!)
Twilight; that's why you can still see everything


Sunday, August 16, 2020

Same list with a few changes

I considered updating the previous list, but I want a record of mistakes the project.

I'm still bothered by having several roads to walk at once--patio lighting, handrail (that is, the last of the Fiberon), cable railing. 

Salvage wood railing mockup will become a template

Handrail

This is tricky. I can't superglue the miters--the material expands and contracts, for one thing. So, on the upper deck, I made the miters as perfect an 1/8" gap as I could. The lower deck is even harder because of the odd angles. So, I've built a mockup.

At least 2 of the 3 miters are not parallel--I'll fuss over the template until it's right, then cut the last of the Fiberon. The subrail at the stairs is too low--I'll fix that. I may need shims in some places, as I did on the upper deck. 

Once I cut six boards, I'll need to super glue 4 miter ends and then paint the undersides.

Upper deck handrails. Paint needs two coats.

Finally, I'm about out of the construction adhesive I used on the upper deck (Loctite PL375), so I'll need two more tubes. I put down a big bead and now I have to deal with the squeeze out underneath--either black or brown paint. I also want to caulk the subrail so that there is no light coming through. If I can't find black caulk (ya think?) I'll have to paint that, too.

Cable Rail

This looks like it will go fairly easily; it's just a lot of rails to install. I'm a little worried about the 30-degree cables at the lower deck stair. Not sure how to start the drill, not sure whether I should use the standard cable spacing story board, etc.

Other than that, however, the cable technology works well.

Patio Lighting

I had planned to attach one end of the lights at the house, then pull up the other end with a loop of paracord attached to a tree, run it back to the house, then out to another loop of paracord at another tree. I bought ratcheting carabiners to tension the paracord. Turns out, according to YouTubers, that's not how it's done. You don't ask the 120V electric line to do all the work.

The new plan is to choose some kind of cable (lighter and easier to work with than the cable rail), and simply install and tension it from house to tree, tree to house, house to other tree. Then, sayeth the web, you hang the lights from the cable with zip ties.

I think I can mount an eye bolt high enough in the two trees to work.

As for the electrical, I had planned two switches at the two doors. Dumb. The post light out front is on a Wemo switch in the basement. I can turn it on from my phone, and program it when to turn on and off. I just need to run power from the breezeway to the SW corner of the house. I'll run a conduit vertically up the outside of the house to a box under the eave. If I'm feeling charitable, I'll install a switch on the way up--an emergency shut-off. An outlet at each deck, the GFCI as planned, and an "in-use" outlet for the sewage ejector.

Wednesday, August 12, 2020

Details piling up--time for a list

 Another to-do list, because I'm paralyzed about what to do next. There are distinct projects:

  • Cut and install the handrails
    • Cut the pieces to fit precisely
    • Super glue the end pieces (where occurs)
    • Level the pieces so the miters work; confirm that the miters are tight
    • Paint the underside of the handrail pieces
    • Use construction adhesive to place two handrails on the sub-rails
    • Super glue the miter while the adhesive is still setting up
    • Place the next handrail with adhesive; super glue the miter
    • When the adhesive has set, drill and screw the handrails in place
  • Drill and insert the 144 cable rail swage lag screws (and the sleeves)
  • Finish screwing down the deck and stair treads
  • Figure out and install hooks on two trees way up high
  • Finish designing electrical; make shopping list
  • Install electrical boxes and conduit; trench along outside of house
  • Run wire and install outlets and switches
  • Cut, crimp, and tension 72 cables
  • Use the tree hooks to hang the patio lights

Handrails
They're harder than I expected, because I want good, tight miters at the corners. On the upper deck, they are simple 45-degree corners, and I'm still having trouble getting them to align. In addition to the miter, the plane of the handrails must match--each handrail rests on two 4x4s, so if they aren't level, or the 2x4 subrail protrudes, the rails won't meet precisely. I'm counting on the adhesive to act like caulk to minimize this problem.

Super glue. It's runny, so it drips out when I'm holding the miter ends--I have super glued my fingers every time I have done this. I will test carpenter's yellow glue on the deck boards to see if that's an alternative.

I'm a little worried that perfect miters will be even harder on the lower deck.

Swage Lag Screws
I realized I don't need to screw in 72 lag screws. I have 72 cables, so I need to screw in 144 of them. Luckily, I bought 80 pairs, so I have 160 screws.

I rewatched these videos: This one from Muzata (the makers of the swage lag screws), and this one from a guy using Muzata screws. It seems that the hydraulic crimper I have is a little easier to use than what the guy in the second video had. 

I bought a genuine Crescent-brand 6" wrench (as used in both videos) and tried it--it makes it easier than the mini wrench or the vise grips. This won't be so bad.

I'm still worried about drilling at a 30-degree angle on the lower stairs.

Hooks on Trees
To my surprise, the internet says screw in your eye bolt. "I'd use a treated deck screw so it doesn't rust or be corroded by the wood tannins. Just don't wrap anything around the tree, like a belt. That will definitely kill the tree as it grows." Davey, the tree people, have an article: "The #1 thing you don’t want is for a nail or screw in your tree to rust over time. That’s why it’s best to choose stainless steel, aluminum or any other rust-proof nails and screws for your project."

I need to see how high my ladder will get me up the tree. I'm not sure what my plan b is if it's not high enough. Nail ladder rungs to the tree! That's the ticket. 

I'll pick up a couple of stainless steel eye bolts: https://www.lowes.com/pd/National-Hardware-N100-189-V2151-Screw-Eyes-in-Stainless-Steel/1001842788. Looks like $2.50 for two. Two carabiners with 5 or 6 feet of rope tied to the carabiner and a big-ish loop on the other end. Then I'll thread the patio lights through the ropes on the ground, lift and snap the carabiners into the tree eye bolts.

Saturday, August 8, 2020

Outdoor Electrical

 I've been thinking about this for several days; here's what I've come up with.

Existing: 

  1. Romex "extension cord" with a plug for the sewage ejector (#29, 20A)
  2. Outlet, switch, and eave downlight in the corner of the breezeway notch. In theory, we can get access from the BR3 Hall (except the downlight)
  3. Eave light fixture outside BA3 seems to be controlled by the dimmer switch at Casey's door. It seems to have power, but isn't lighting. Tried with known good bulb. Tried to isolate circuit (1, 3, 13, 15, 21, 26, 28, 29, 30A, 30B--tester behavior changes with #22 off).
  4. Garden light on west property line, controlled by switch 4 in the BR3 Hall. (We don't know what switch 3 controls.) The garden light comes on, intermittently, suggesting a dangerous 120V situation. (Circuit #6--we'll leave it off for now.)
  5. Outdoor wall switch outside BA3 with conduit running into the dirt.

Given this confusion, the initial plan had been to tap circuit #29 and install a number of outdoor outlets, including a new one for the sewage ejector, all protected by one GFCI. Then, using this power source (item 1), install an outlet at eave height controlled by a switch outside each door. We can still do this, but we want to resolve items 2 and 3 before painting the house.

The electrical code wants every outside door to have an inside switch controlling a light outside the door. We're not going to do that, but if we could make Casey's switch work, that would be cool. 

Distribution
I considered EMT metal conduit (I own a bender) and liquid-tight conduit, but since we have to use UF-B cable anyway, I think I'll just bury it, as we did with the post light in front. Dig a 12" trench along the house from the glass door to the southwest corner. The 3-way switches need to connect to each other, but not to each outlet, and laying cable in a trench means the wires don't need to connect in each outlet.

I think PVC (Cantex, Sched. 40) will work from the boxes to the trench. Lowes sells 10-ft, 3/4" for $3.00.

The boxes can be Sigma Electric metal with three 3/4" knockouts. We'll need a 3/4 bushing connector (Lowes, $0.43) for each.

About 40' horizontal, with about 36' verticals. 250' of UF-B 14/3 should do it. We only need /3 for the switches, but it might be easier to have just one kind.

GFCI
We'll put a box where the Romex pops out now and fill the box with a Legrand 20A non-outlet GFCI (Lowes $21.24). All the outlets and the light outlet will be protected.

Switches
Basic 3-Way toggle switch (Lowes $1.69) with a TayMac weatherproof cover (Lowes $4.98).

Outlets
In-use cover for the sewage ejector and light outlets (Lowes $8.98), but simple Sigma Electric metal cover (Lowes $3.67) for the others. I'm thinking we need outlets:
  • Above the upper deck
  • Below the upper deck (for under-railing low voltage lighting)
  • Sewage ejector
  • Above the lower deck (east end)
  • Below the lower deck (west end) for low voltage transformer
  • Switched lighting outlet
I'm thinking we can get by with simple Eaton 15A receptacles (Lowes $0.74).


Friday, August 7, 2020

Into, or Thru?

New controversy. I had decided on cable accessories that screw into the posts. To add tension, you tighten the screws. This works because one side is reverse-threaded. 
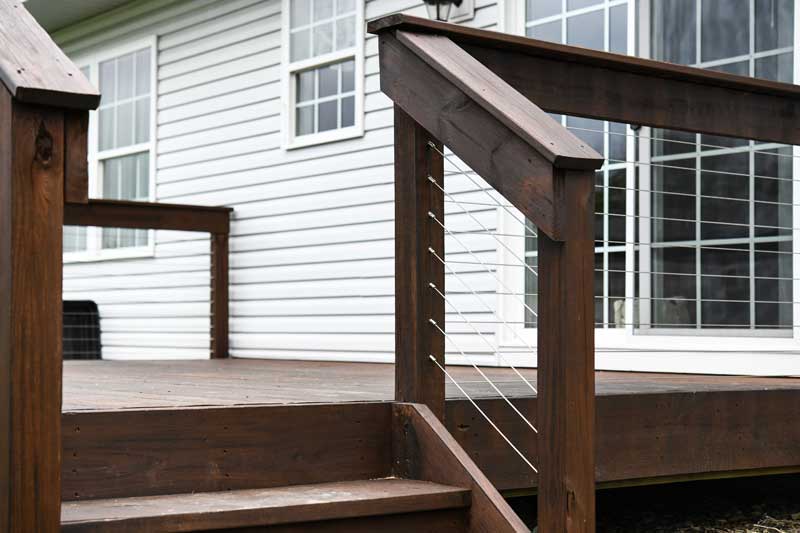
Swage lag screws look like this

With this system, you can see where the stainless steel receiver has been crimped to hold the wire, and you may even see a bit of the lag screw threads. A pair of swage lag screws is about $3 from many sources.

The controversy is that I've found another product that involves drilling through the 4x4s. You still crimp the wire at both ends, but you use an allen wrench at one end to tension the cable and all that is visible between the posts is the wire. For a clean look, they sell stainless steel sleeves to cover the drilled holes.
The fittings on the left tighten without turning the cable

Muzata sells these for $8 a pair. In addition, however, you want to clean up the holes with a pair of sleeves, which adds $1.60. So, the "invisible" fittings are 320% as expensive as the swage lags.

What is that in real dollars? Well, first, in real effort, the invisible connectors require drilling all the way through the 4x4s at both ends, then drilling again, precisely, for the tensioner. With the two posts at the house, I would have to un-bolt the posts for that second drilling.

I have 9 panels of 8 cables each, so we're talking about 72 pairs of fittings. So, $216 vs. $691.20 or $475.20 more for invisibility.

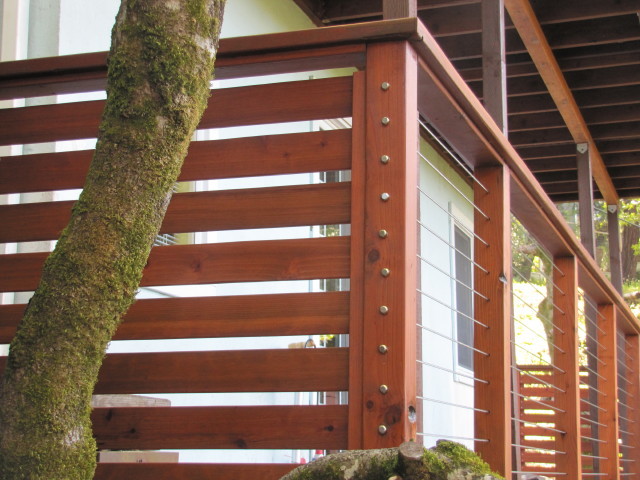
There's one more option. I could run the cable around the corners. That would mean just 24 pairs of fittings and a few more $0.80 sleeves. About $300, but we'd have cables at the corners.
Cable at the corner, like this

I am leaning toward my original thought--swage lag screws. But I don't want to spend $400+ on cable stuff without considering all the angles.


Thursday, August 6, 2020

The End of the Handrail

The Fiberon handrail is going to be fine, I think. I'll put down a thick bead of construction adhesive and two screws into each 4x4. The adhesive will act as a caulking, to eliminate seeing light through gaps between the handrail and 2x4 subrail.

But how do we handle the ends?

A. Cut it cleanly. Maybe sand it a little, unlike the photo. Maybe paint the edge brown to match.
B. Power sand the edges. Make it look intentional and, at the same time, have only safe, rounded edges. Maybe we paint this brown to match, like A.

C. Miter the ends. This is time consuming and needs to be quite precise.
The main edges we're discussing are: the top of the upper deck stairs--it's very visible--and the ends of the prow railing on the lower deck. There are two other ends where the railing meets the house; they can use type A (except that the end on the upper deck is visible through the glass door). The weird one is the bottom of the lower deck stair railing. The latter angles down, so its a lot less visible. 

There are only 6 ends: 1 stair, 1 at house, and only 4 we might miter. Even if it's tricky, the miter is doable.

Steps Project

I want to remodel the whole front yard. New hardscape, and so on. But at the moment, my path from the driveway to the house is only barely w...