Electricians are in high demand and charge $200+ an hour. That's crazy. In Washington State, however, you have to have 8000 hours of documented apprenticeship before you can get a license. That's 4 years. Guess I'll hold on to my amateur status.
 |
| The "Old Panel" |
It is here that I found my elusive unswitched (21). It's right there with the blue tag on it. You don't see it?
 |
| There it is: black and red. Red is often code for "I'm connected to a switch," which is where I think this line goes next. |
The first question: Which white wire do I attach to? I think there's something about one side of the new panel or the other (21, being odd, is on the left side). The white, neutral, should be the same as ground (there are bare copper wires in the old panel), but I think it would defeat the GFCI to attach my new white to ground.
I'll solve the "which neutral?" question through trial and error if I have to. I've mis-wired circuits before so that when I turned the power back on, the breaker clicked off just that fast. It's all in the same (BR3 Hall) room. I could even deal with it bursting into flames.
The next question is: Do I want to clean this up? I could identify each of these circuits the same way I found (21)--that is, magic--and in theory I could attach them in a more orderly way--a splice block.
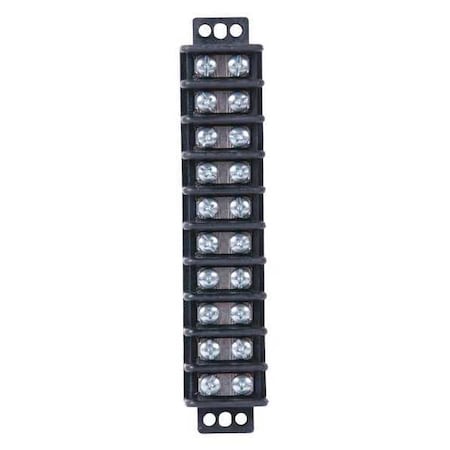 |
| 10-circuit Terminal Block |
There are 27 circuits, so I'd need three of these [update: no, I'd need six: neutral wires count, too]. They would be more orderly and could be labeled, but the electric code frowns on exposed juice. Jamming your finger on one of these screw heads wouldn't be healthy.
The cover of the old panel has a door that would allow a layperson to reach the splice blocks. If I replaced that cover with one that had no door and required screws to remove, I think it would be up to code.
I'll keep thinking and researching this question. I don't want to do good electrical work and rely on crap done by DIYers of the Past.
But, alas, my next step is clear: I'll run new Romex from the attic down to this box. I'll connect it somehow and the other end of the Romex will eventually light and power the workshop. (I say alas because, blogging is much more fun than the attic.)
Update: It's a bridge too far. There's no support for crawling over the Bath #3 ceiling--I don't want to "drop in" on the bathroom. When I reached the outsider wall, I'd be working in the eave space to try to get the wire down. The BR3 Hall ceiling is the same way. I could hire a lightweight four-year-old and tell him to stay on the 2x4 rafters, but...just, no.
So, I see two alternatives, one of which is a non-starter. That is that I could bust into the siding on the weird triangular eave and push the wire in from the exterior. From what I can see from in the inside, that would work.
 |
| The horizontal lumber behind the flex vent in the upper right is the outside wall. The wire needs to go through the top plate in the space beyond that. The darkness beyond, however, is just the triangle. |
They make Wiremold raceway in 10' length ($7.97), 5' length, and an inside elbow ($3.97). I think Ivory is best (the Hall is yellow now)--I'd just paint it out. That would get me unswitched (21) in wall next to the latch side of the door.
First device will be a GFCI outlet at 48", then to the switch at the door and up to three switched outlets for the fluorescent fixtures. From the switch, I'll run hot to other 48" outlets over by the cabinets and on the west wall. Also from the switch box up to two or three outlets under the loft.


No comments:
Post a Comment